Blender may be the biggest beneficiary after the launch of GPT-6 Astra.
Everyone is having a blast.
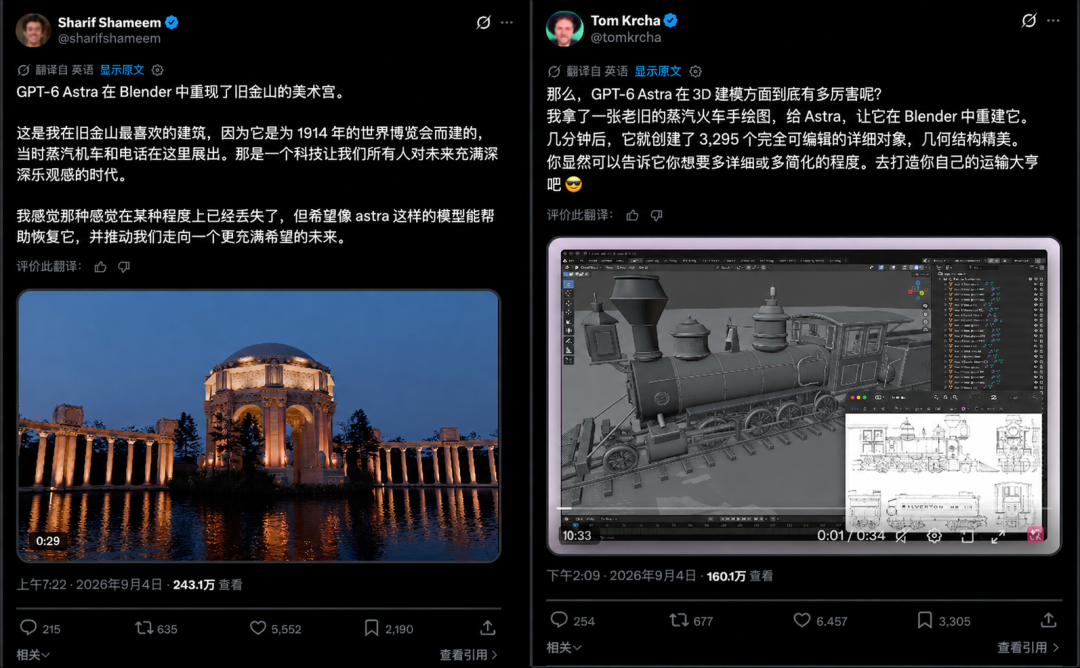
The download count for Blender has skyrocketed...
I didn't expect that 3D, in such a strange opportunity, would come into everyone's view.
Under my article about testing GPT-6 Astra, a friend left this comment.
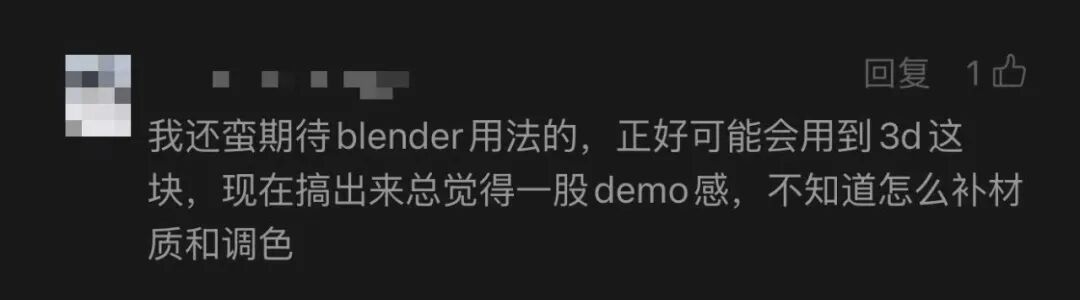
Many friends also asked if a tutorial could be released on how to use GPT-6 Astra to control Blender, as they wanted to join in.
So let's get to it.
Today, I will share what I think is a suitable way for beginners to get started with GPT-6 Astra + Blender.
Follow me step by step, and you too can create your own first 3D Blender model from scratch.
OK, let's get straight to the point.
I. Preparation
Before we officially start modeling, we need to prepare what is necessary.
A ChatGPT account that can use GPT-6 Astra and the desktop app.
Download link: https://chatgpt.com/zh-Hans-CN/download/
After installation, open ChatGPT, click the mode switch button in the upper left corner, and enter Codex.

Then, click the plus sign next to the project on the left to create a new local project.
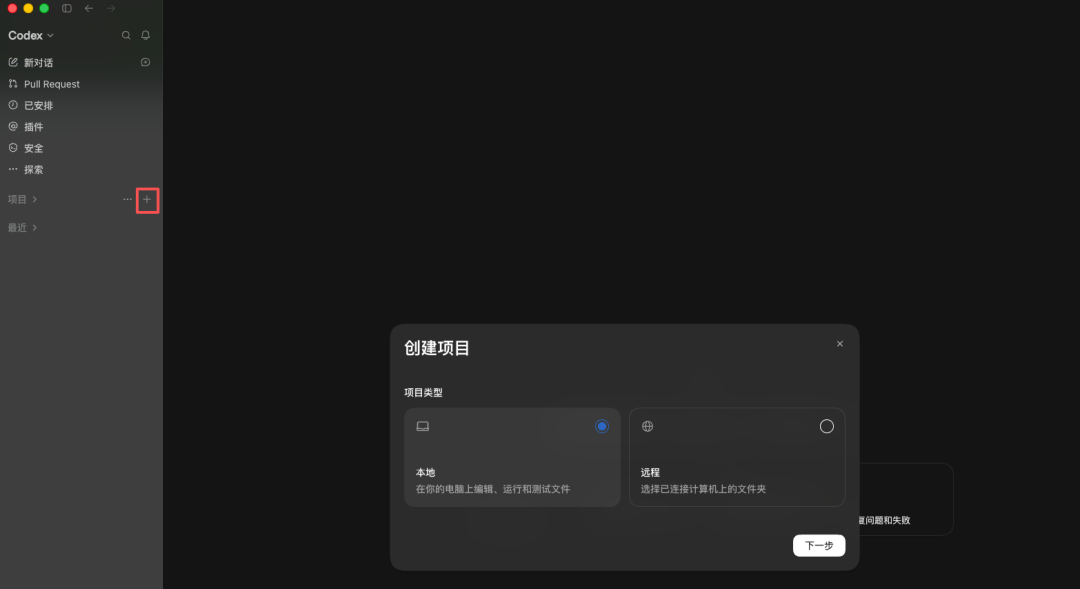
Then, just tell it to download and install Blender for you.
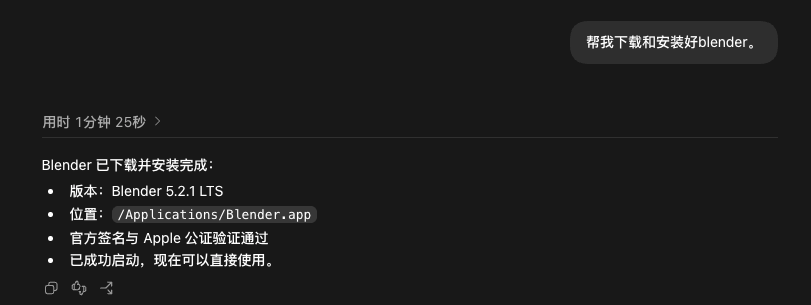
Codex will help you download the corresponding installation package based on your computer system.
Of course, here's a fun fact: if you have Steam installed on your computer, you can also download Blender manually from Steam...
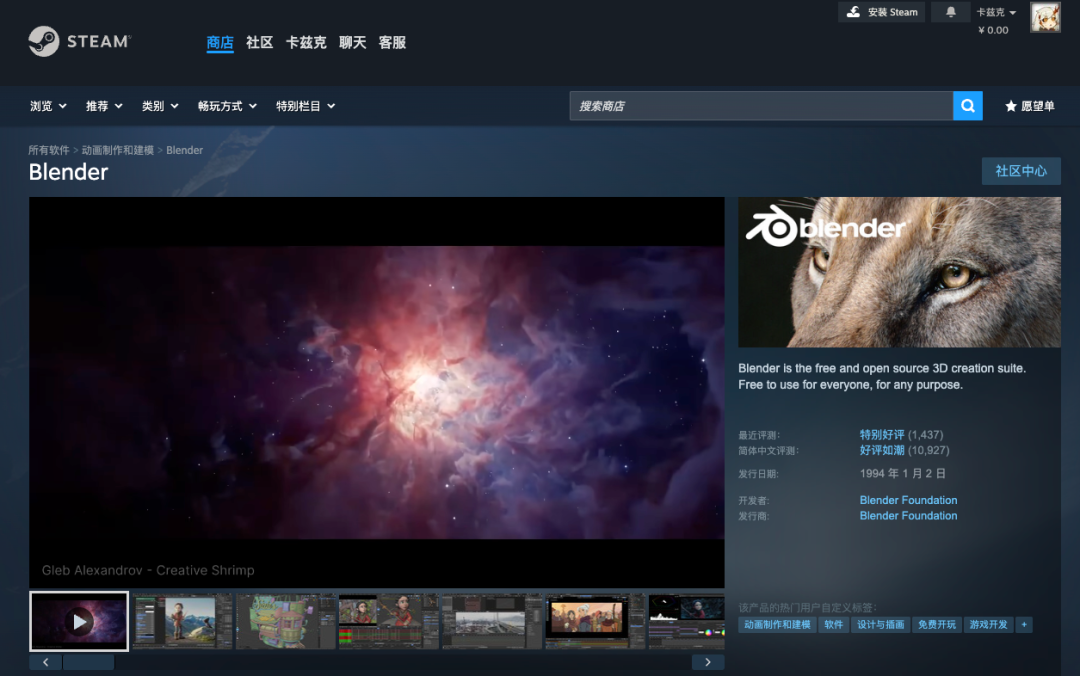
Blender is a free, open-source 3D creation software, and it now feels like it has replaced C4D to become mainstream. I remember when I first started learning 3D in 2018, C4D + OC renderer was still the trend, and then in 2019 and 2020, Blender emerged, and until now, due to being open-source, it has perfectly reaped all the benefits of the AI era.
This tool basically covers the full stack, being able to do modeling, rigging, sculpting, materials, lighting, animation, and rendering.
When you first open it, the interface might look a bit intimidating, filled with buttons and parameters, and there is a classic Box in the middle.
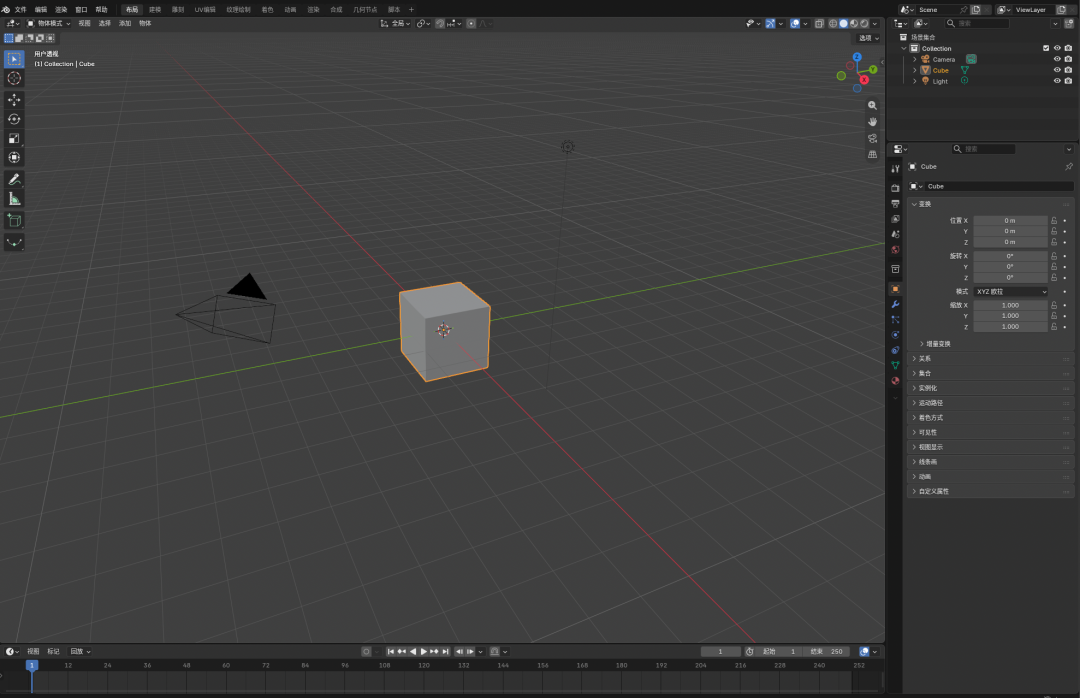
However, there is no need to panic.
Codex can directly operate for us.
We still need to install two more things.
One is the MCP officially released by Blender, and it is important to note that the official has released its own version; do not install third-party plugins from the community.
Official address: https://www.blender.org/lab/mcp-server/
You can also have Codex download it for you directly.
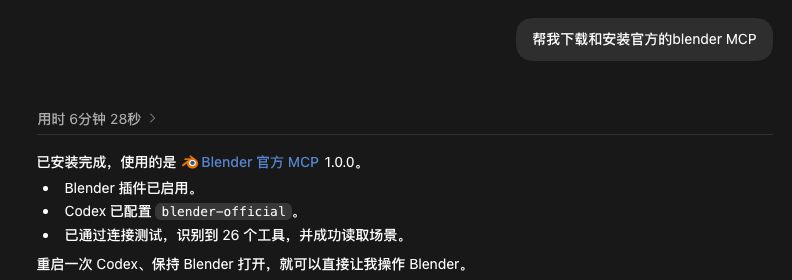
The other is the Computer Use plugin provided by ChatGPT.
Click on the plugins on the left, search for and install Computer Use.

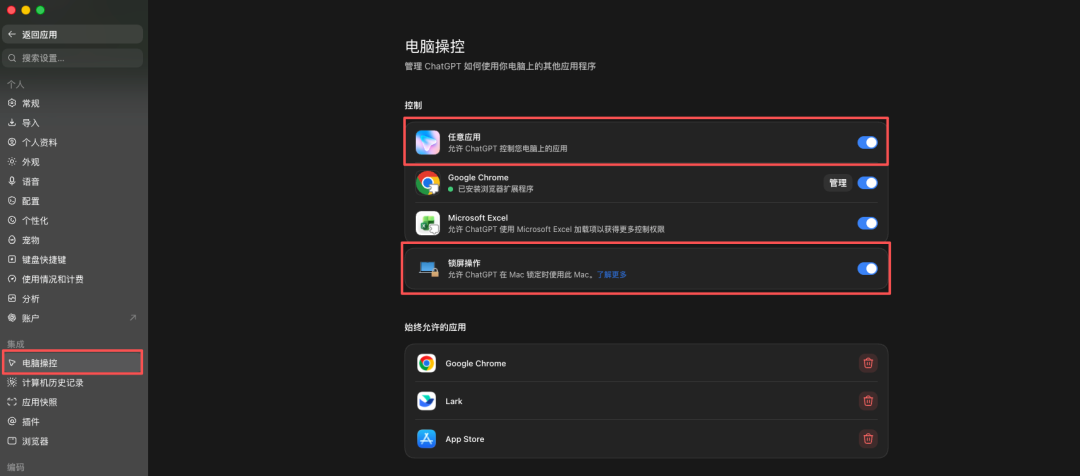
Then, remember to enable the permissions.
Click the avatar in the lower left corner of ChatGPT, enter settings.

Then find Computer Control on the left and enable any applications.
Mac users can also enable the lock screen operation below, so even if the computer enters lock screen mode, Codex can continue to execute ongoing tasks.
At this point, everything needed is prepared.
Next, let's officially start modeling.
II. Start Making
Now there are about three ways for GPT-6 Astra to control Blender.
The first is Computer Use.
Learn how humans model.
The operation is also very simple.
You just need to plainly tell GPT to open Blender using Computer Use, then clearly describe what you want to make.
It will find buttons, move the mouse, and input parameters by itself, building the model bit by bit.
This time, I gave it the task of building a complete model of the Hall of Prayer for Good Harvests in Beijing.
The prompt I gave was as follows:
@computer-use Use Blender to build a complete and detailed model of the Hall of Prayer for Good Harvests in Beijing. First, gather materials, referencing official data, real-life photos, and reliable measurement maps, to reconstruct the hall and the surrounding platform based on the actual layout and proportions. Model the hall body, columns, beams, bracketing, doors, windows, decorative elements, three-tier eaves, blue glazed tiles, gilded top, three-layer white marble base, railings, observation columns, steps, stone carvings, and the ground as separate models, keeping them as independent objects, clearly named, with unified proportions and material styles. Focus on refining the roof curves and eave proportions, bracket layers, beam and facade decorations, tile arrangements, and drip tiles, stone railing carvings, as well as the surface textures of wood, glaze, and white marble, achieving fine and realistic details even at close range. Render and check after completing each batch of assets, rework if not satisfactory. Reference data from the front, side, top view, and close-up to check shape, position, proportions, material, floating and clipping issues. First refine a group of columns, beams, and eaves as a quality sample, and expand to the entire project after passing. The entire modeling process should be completed through manual clicking in the computer interface, without using code, scripts, or command lines to generate the model.
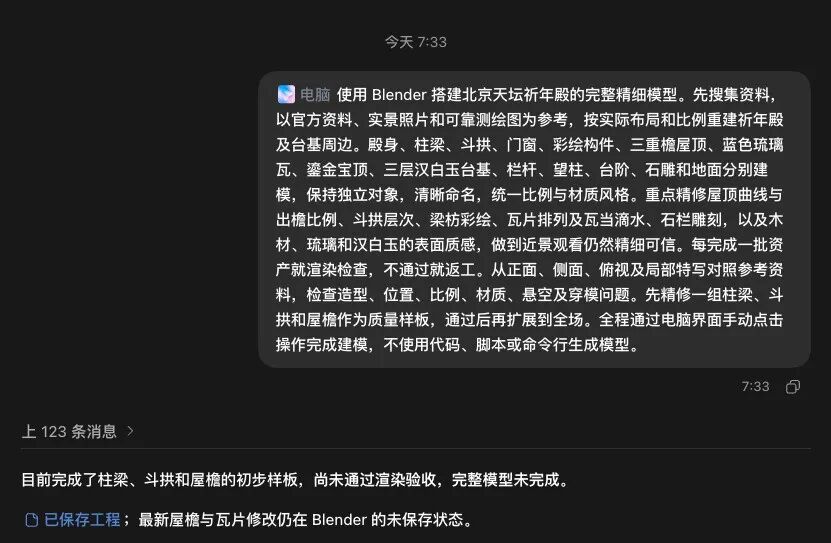
After sending it out, the subsequent tasks can all be entrusted to it.
After about 4 hours of back and forth,
it finally made the Hall of Prayer for Good Harvests.
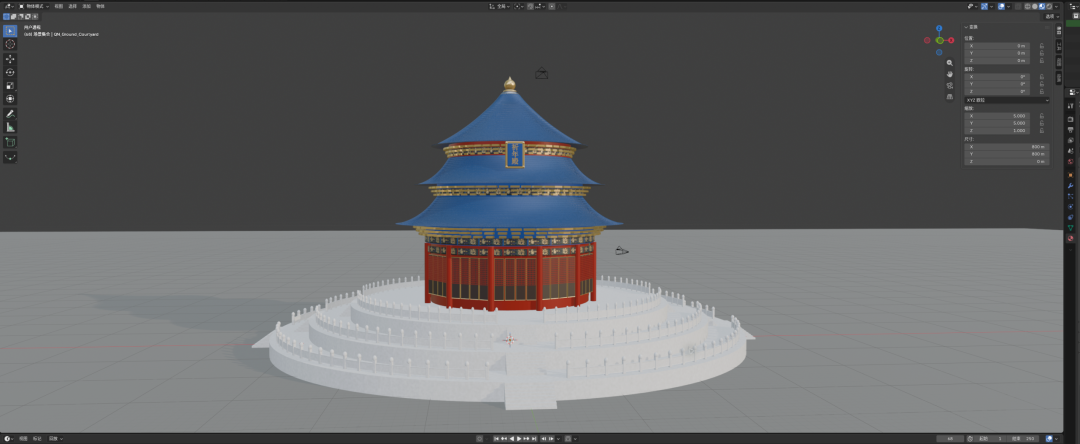
I think the result is quite good.
I even recorded a sped-up video of the process.
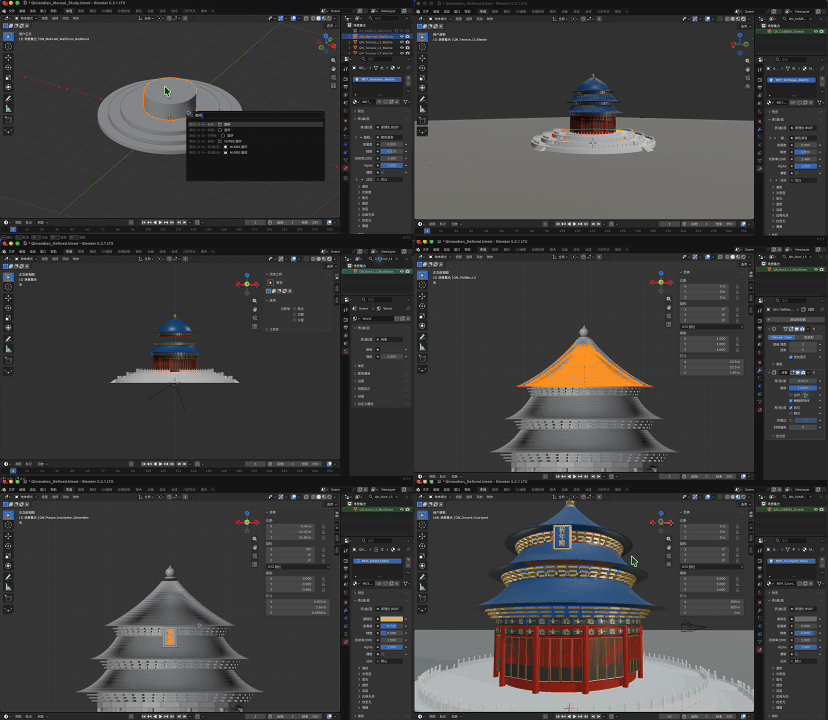
Watching the model being assembled bit by bit is truly satisfying.
Computer Use has a clear advantage.
It is intuitive and operates just like a modeler would; it does what a human does.
You can clearly see what it is clicking on, what it is modifying, and where it is getting stuck.
But its biggest issue is that it is expensive...
This one Hall of Prayer directly cost me nearly half of my $200 Pro membership limit.
A bit painful.
Although GPT-6 Astra's Computer Use is indeed very powerful, there are also two faster and more cost-effective methods for Blender.
The second method is the MCP released by Blender.
This can be understood as a dedicated channel between GPT and Blender.
The MCP can directly read scenes and objects in Blender and perform operations through the underlying API.
The speed is usually much faster.
I used a motorcycle to show everyone.
The prompt I provided was as follows:
Please use Blender's MCP to create a detailed, editable 2026 Indian Chief Vintage Sturgis, SD Edition motorcycle. First, consult data about the real vehicle, generate consistent multi-view reference images, and then begin modeling based on real photos and dimensions. First, ensure the overall vehicle proportions, frame, fuel tank, and fender surfaces are correct, then add the V-twin engine, spoke wheels, suspension, headlights, handlebars, and leather seat. Keep major components independent and clearly named, adding materials that match the real vehicle. Render and check after each batch of assets, rework if not satisfactory, focusing on checking proportions, shapes, mechanical connections, and part intersections.

The result was like this.
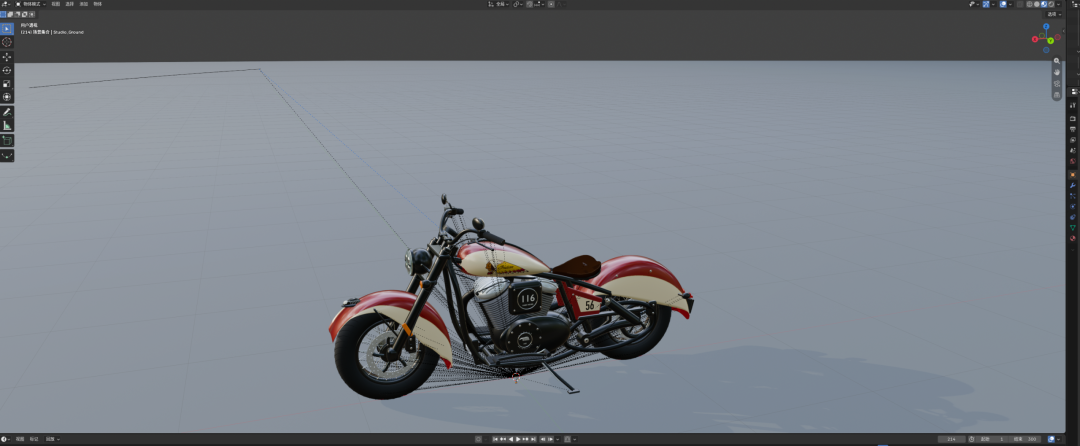
The model is good, but if it doesn't move, it's still not very fun.
So for the second step, I let it continue based on the existing model to create an assembly animation of the parts.
My prompt was:
Please create a 10-second, 30 fps assembly display animation of the parts using Blender's MCP based on the existing Chief Vintage Sturgis, SD Edition model, retaining the existing model’s appearance, two-tone paint, and materials. 0-2 seconds: Based on the frame, sequentially suspend and expand the main assemblies such as the engine, wheel set, front fork, fuel tank, fender, and seat, maintaining clear spatial relationships. 2-7 seconds: Parts should move to installation positions in reasonable order and staggered timing, gradually assembling into a complete motorcycle. Movements should be smooth with natural acceleration and deceleration. 7-10 seconds: The camera should slowly circle around the complete vehicle, showcasing the body surfaces, engine, spoke wheels, and material details. Major components should remain independent, and both the animation and camera trajectory should be editable. Render in stages and check, focusing on the motion path, part intersections, composition, and continuity of shots.
The final result was like this.
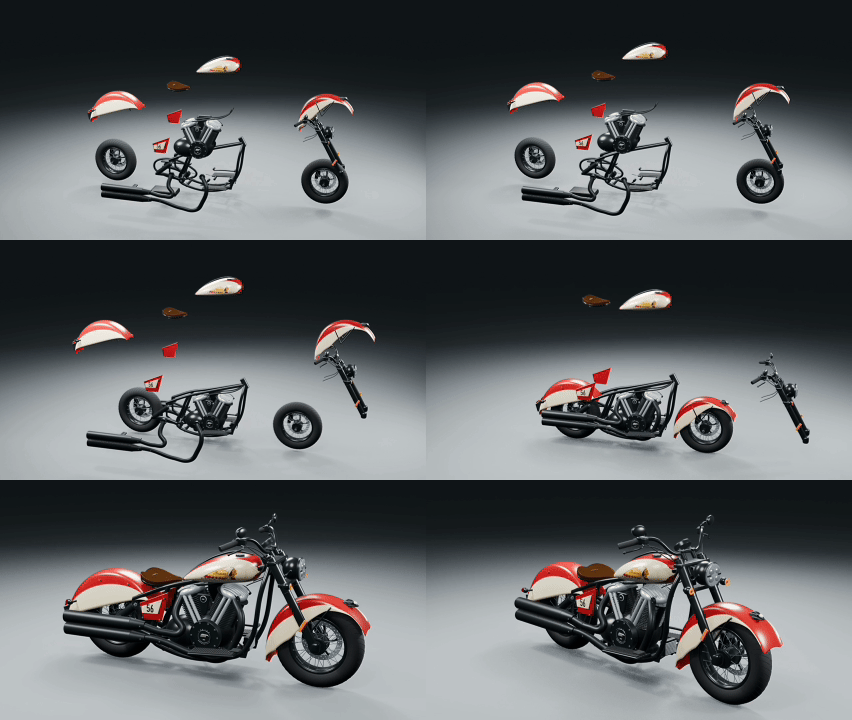
Now it has more flavor.
If you want it to look even better, you can let GPT-6 Astra build a scene in Blender for enhanced rendering effects.
However, during this process, I also encountered a problem.
While generating the animation video, the MCP ran into a timeout...
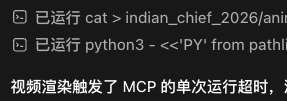
This also exposed a limitation of MCP in handling complex tasks.
It is not difficult to resolve.
When encountering complex operations, you can try breaking the task into smaller steps and completing them one by one.
Or you could try the following method.
The third method is calling Blender through the CLI to execute Python scripts.
This is also the most commonly used method in actual operations.
It is very similar to MCP at the underlying level; both methods will use Blender's Python API.
Once GPT writes the code, Blender will use bpy to create models, add materials, and so on, to complete the subsequent processing.
The difference is that MCP is more like connecting and controlling a running Blender, while CLI starts a Blender process to execute the script.
But under the same conditions, the models produced by both methods will not show particularly obvious differences.
In daily use, I recommend using GPT-6 Astra + Blender MCP + Computer Use for modeling.
III. Collaborating with 3D Generated Models
Now everyone has seen the effects of GPT-6 Astra + Blender, but you may notice that most of those models are basic geometries.
This is something AI is currently quite good at.
However, when it comes to biological types, the results are still not very good.
For example, asking AI to replicate a character like this Jinx.
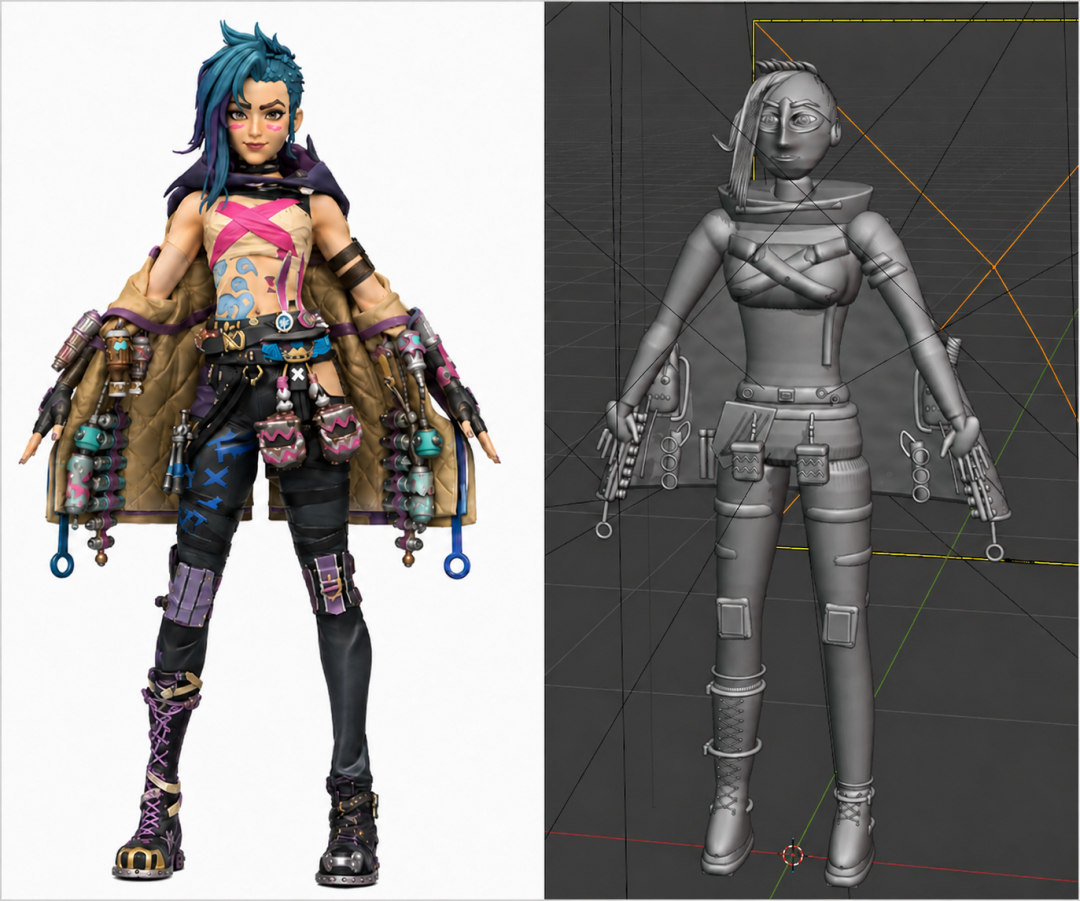
It can only be said that it is completely unrelated...
This is also a very obvious limitation when GPT directly models in Blender.
From the earlier Temple of Heaven and motorcycle models, it can be seen that GPT-6 Astra is better at structures like buildings, vehicles, and mechanical devices that can be separated into many regular geometric forms.
The images we provided might indeed be a bit challenging because characters are among the most complex in modeling, which is completely different from modeling geometric shapes; traditionally, we do basic character modeling using a Box to get a rough shape, and then we usually sculpt it directly in ZBrush, which is really a traditional craftsmanship, especially in contouring muscles, very similar to what seasoned artists would do by hand.
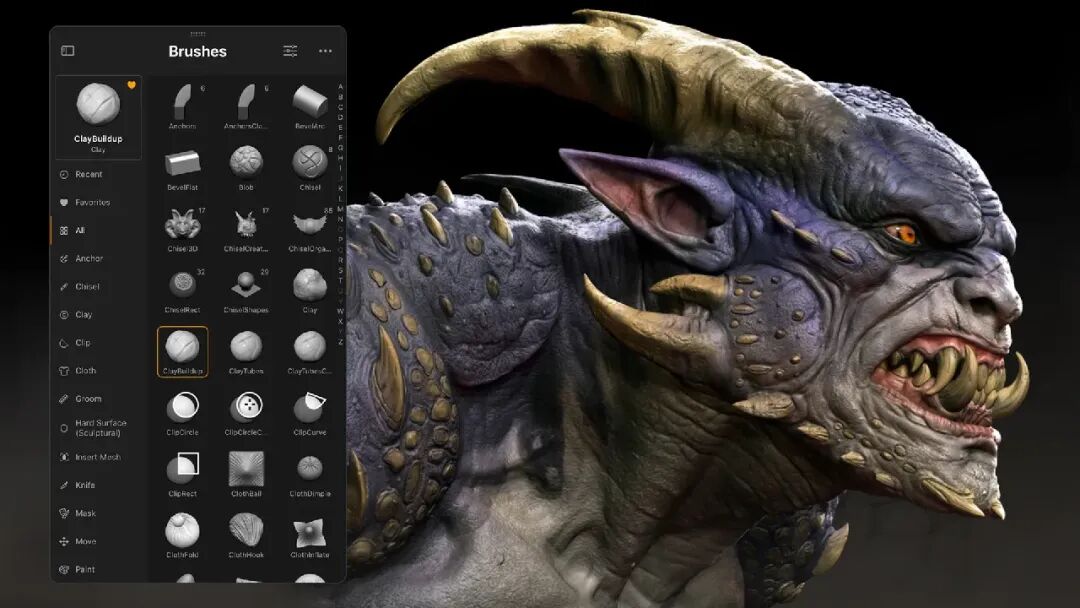
So, if you want to replicate some 3D models of biological types now, you might as well not force GPT-6 Astra to operate Blender. Instead, you can use dedicated AI 3D generation models.
For example, this character art of Jinx in a collectible figure style.
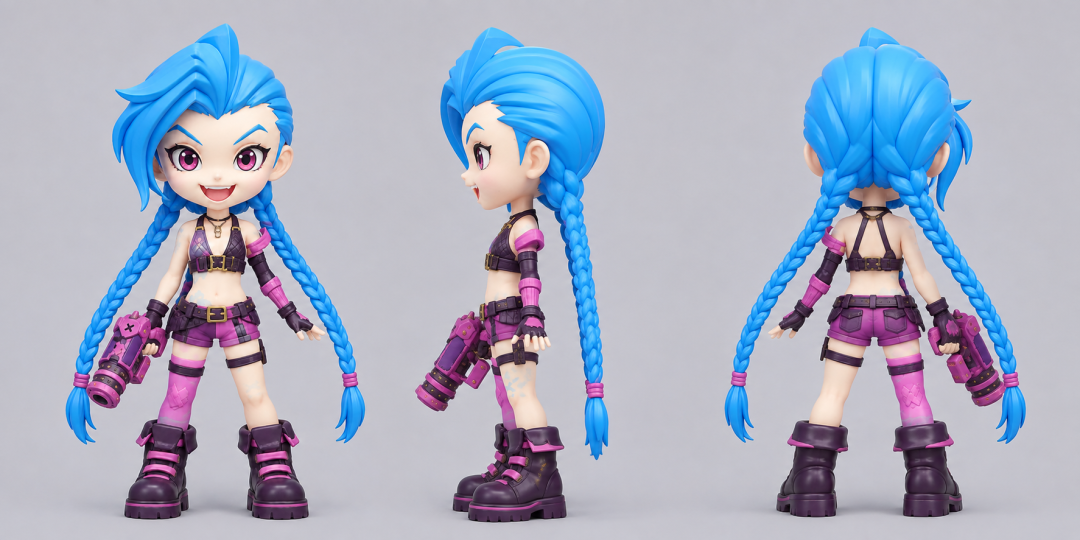
Let GPT-6 Astra control Tripo AI to generate the character 3D model, and then import the result into Blender.
In this version, the effect is significantly better.
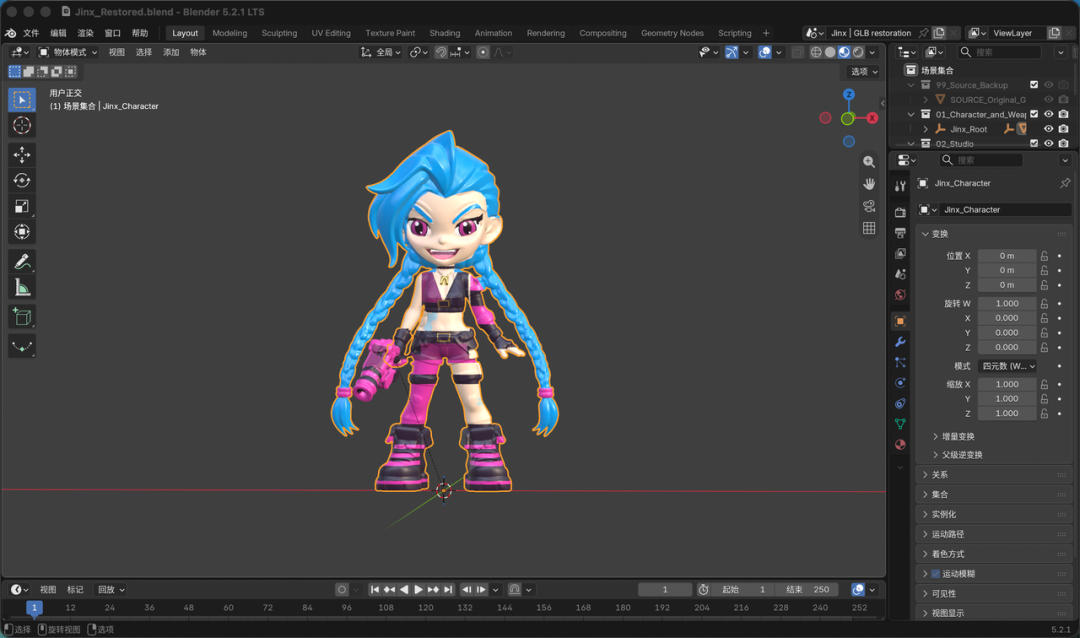
Thus, for biological types, using GPT-6 Astra to control AI 3D generation models, importing them into Blender, and handling all subsequent processes will be more appropriate.
Let’s take the character of 牛来 as an example to walk through the full production process from modeling to animation.
In traditional film and game production, modeling generally requires several steps.
The modeler first uses reference art and various angle reference images to construct the character's proportions, contours, and details bit by bit.
In addition to the appearance, they also need to tidy the model's topology, unwrap the UVs, and create materials and textures.
Only after doing all of this can you have a usable static character.
If you want it to be animated, you also need to continue with bone binding, assigning skin weight so that the body parts and skin can deform naturally with the bones.
Afterwards, it comes to the actual animation process, posing, setting keyframes, and continuously adjusting the transitions and rhythms between actions.
Each step requires meticulous refinement.
The aspects that tend to consume time are often these tedious and monotonous foundational tasks.
So this time, we’ll follow this workflow.
First, upload a reference image of the character 牛来妈妈, and then let it generate a unified multi-view setup for modeling reference.
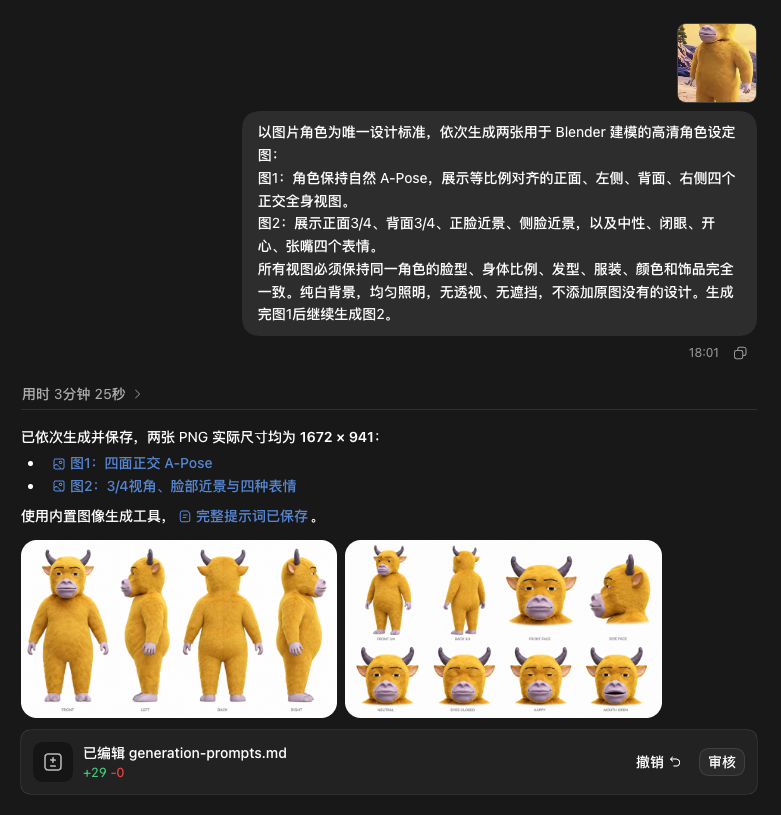
Next, we officially enter the Blender stage, creating the basic outline and body structure of 牛来妈妈.
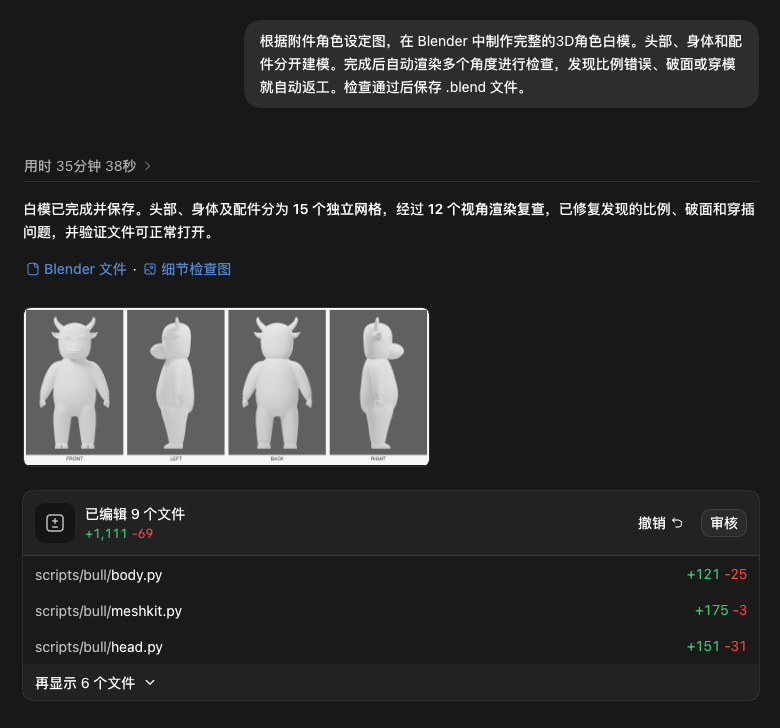
Then, tidy the UVs, make materials, and color it.
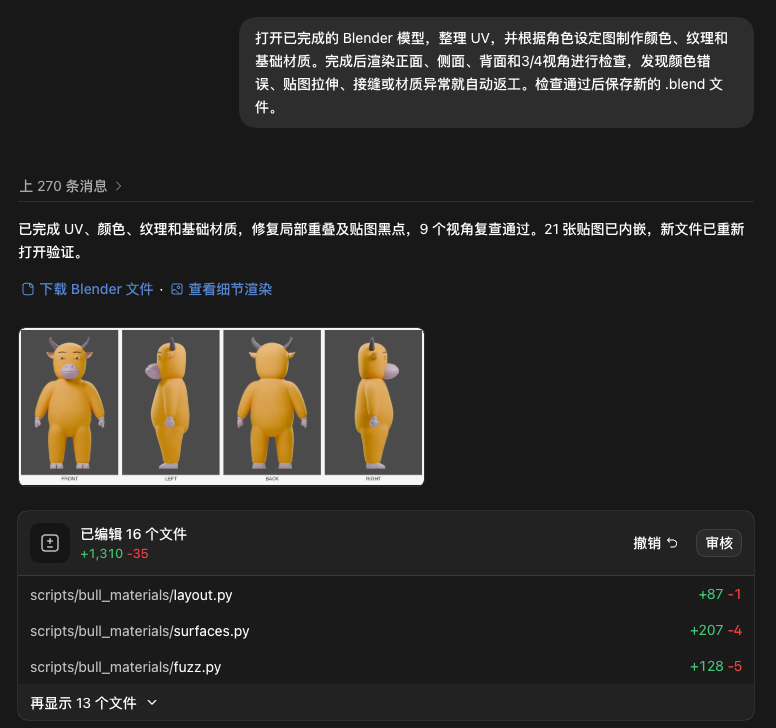
After completing this, I felt there were still some issues with the proportions of the eyes and head, so I made some slight adjustments.

Once the static model is almost done, I can proceed to bind the bones.

Finally, it's time to handle the scene, expressions, and animation.
I thought it would be fun to have it do a little dance, and shout "mom" and "牛来" according to the BGM!

The final result was like this.
Although it is somewhat abstract, it is quite fun.
Moreover, this method is completely applicable for creating interesting projects.
You can upload a photo of yourself or a friend and let the AI turn it into a 3D cartoon figure.
Then, you can choreograph a dance or arrange some quirky actions.
It's really amusing.
Final Thoughts
I suddenly remembered a 3D work I posted in my circle of friends seven years ago.

It was based on a reference from an overseas artist, and I modeled, textured, and rendered it bit by bit myself.

I spent an entire month working on that image after getting off work every day.
That night, I rendered it all night using OC, and released it just after 8 AM.
A month of effort for just one image.
Looking back now, it seems like an incredible thought.
Creation is becoming increasingly egalitarian.
Everyone with an idea can let AI operate software and help them create it.
Although it is still expensive and relatively slow now, at least it can be done.
And the trend is certainly towards lower costs, just like last year when we couldn't imagine that a long coding task could be done so cheaply; back then, even making a PPT would require $20.
However, just because everyone can do it does not mean great works will emerge.
In the future, what will truly create gaps will be your ideas, aesthetics, judgment, and that bit of curiosity willing to keep experimenting.
I am looking forward to seeing what everyone will create.
In conclusion,
I wish everyone happy modeling.
免责声明:本文章仅代表作者个人观点,不代表本平台的立场和观点。本文章仅供信息分享,不构成对任何人的任何投资建议。用户与作者之间的任何争议,与本平台无关。如网页中刊载的文章或图片涉及侵权,请提供相关的权利证明和身份证明发送邮件到support@aicoin.com,本平台相关工作人员将会进行核查。


