Original: Jiang Sange
Source: ASAK
AI is becoming more and more common in our work and life. As AI painting and AI art fonts have become quite popular recently.
With simple text and Stable Diffusion, various desired style effects can be generated. Here, we mainly use the depth and tile models in ControlNet, as well as enlargement scripts. Let's start with a detailed tutorial.
Creating the text base image
Here you can design the font yourself. To save time, I directly used an online calligraphy font website, input "白露" (Bailu), and selected 2 brush fonts as our font templates (select transparent background and download single characters as a package).
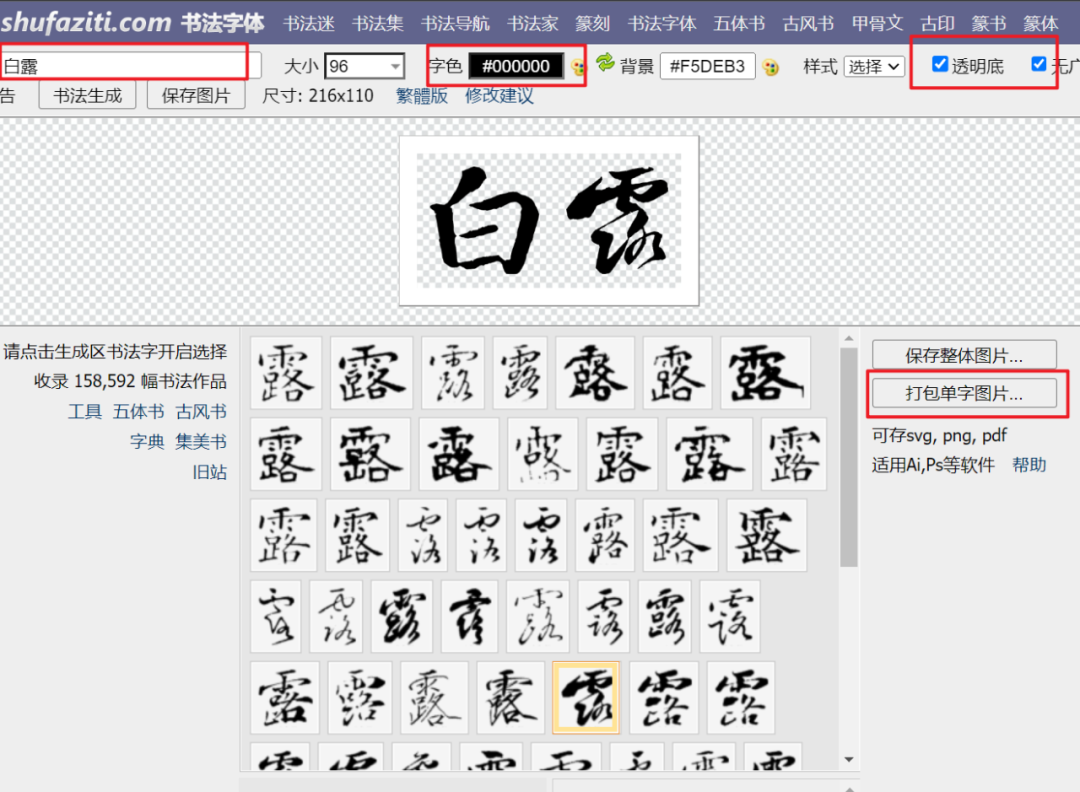
Website: http://www.shufaziti.com/
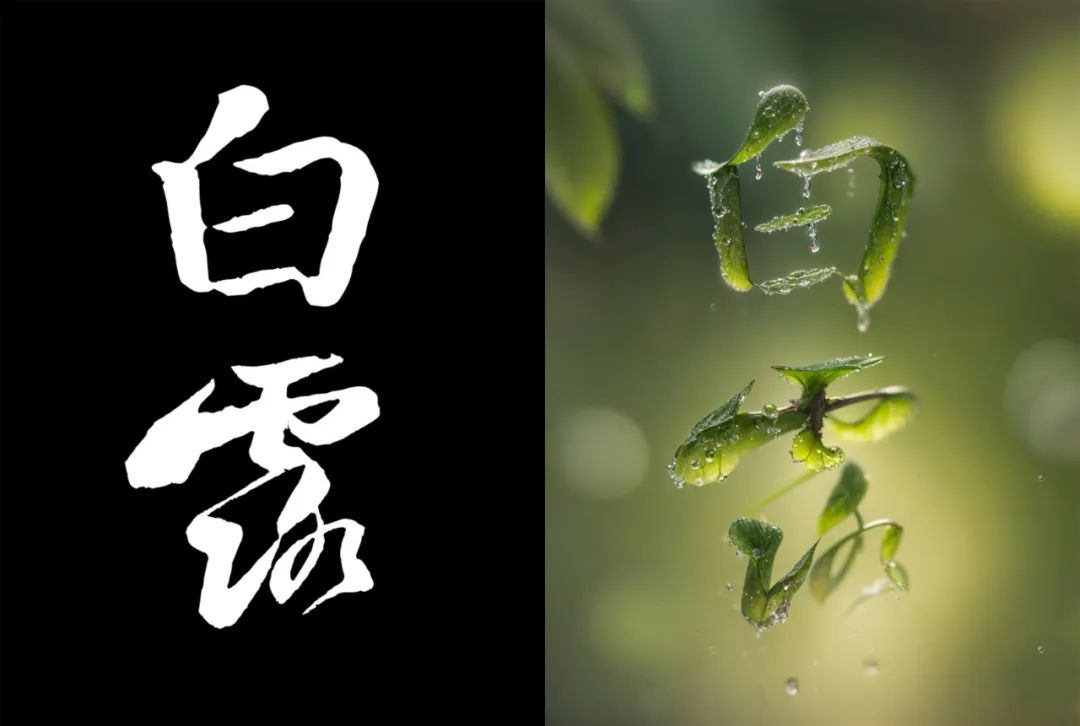
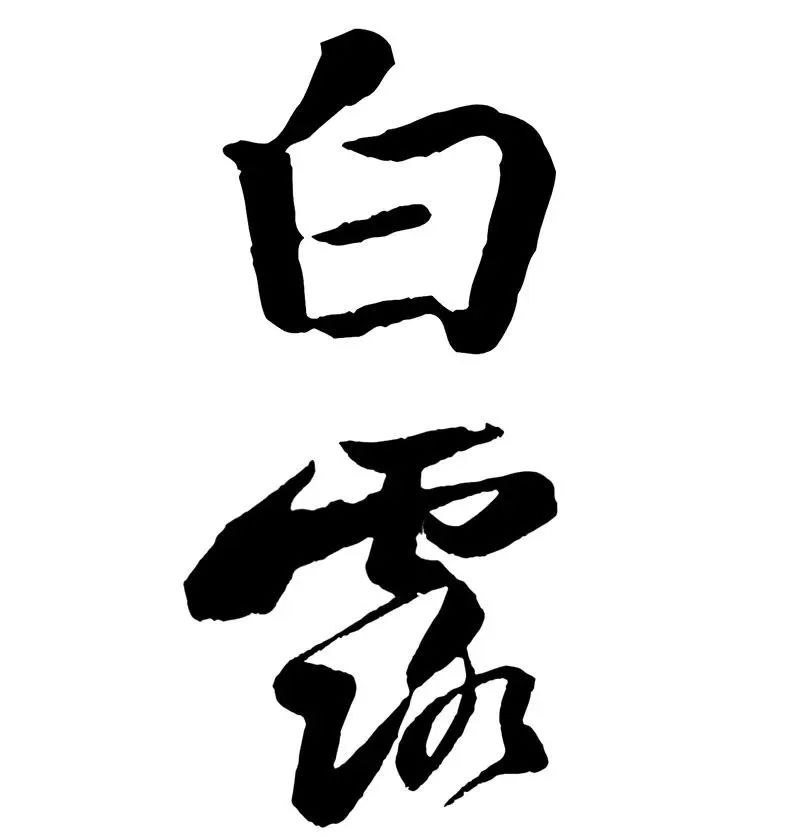
Then import it into Photoshop, arrange it in a top-down format, white text on a black background. This completes the base image, as shown in the following image:
Setting SD parameters
Open Stable Diffusion, I used the autumn leaf package. In the document mode, click on ControlNet at the bottom, drag the processed image into ControlNet, and check "Enable, Perfect Pixel, Allow Preview". Click the upward arrow on the right to send the size to the document.
Choose the invert preprocessor (white background, black text reverse color, if it's a black background, this step is not necessary), and select the depth model. The lower the weight, the greater the text transformation. I'll leave the default weight for now.

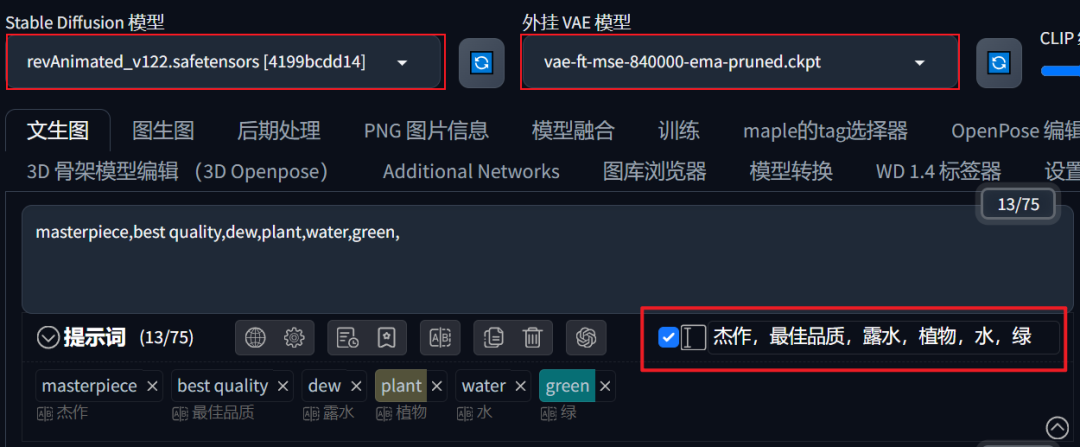
Then enter the positive and negative keywords. Since we want to match the word "白露" (Bailu), the desired effect is leaves and dew on top. So the keywords should include plants and water. Here, I entered "masterpiece, best quality, dew, plant, water, green" for the large model revAnimated_v122, and VAE selection 840000.
Positive keywords: masterpiece, best quality, dew, plant, water, green.
Below are some commonly used negative keywords. To prevent people from appearing in the image, I also added "person" and "hand".
Negative keywords: NSFW, EasyNegative, worst quality, low quality, hand, people.
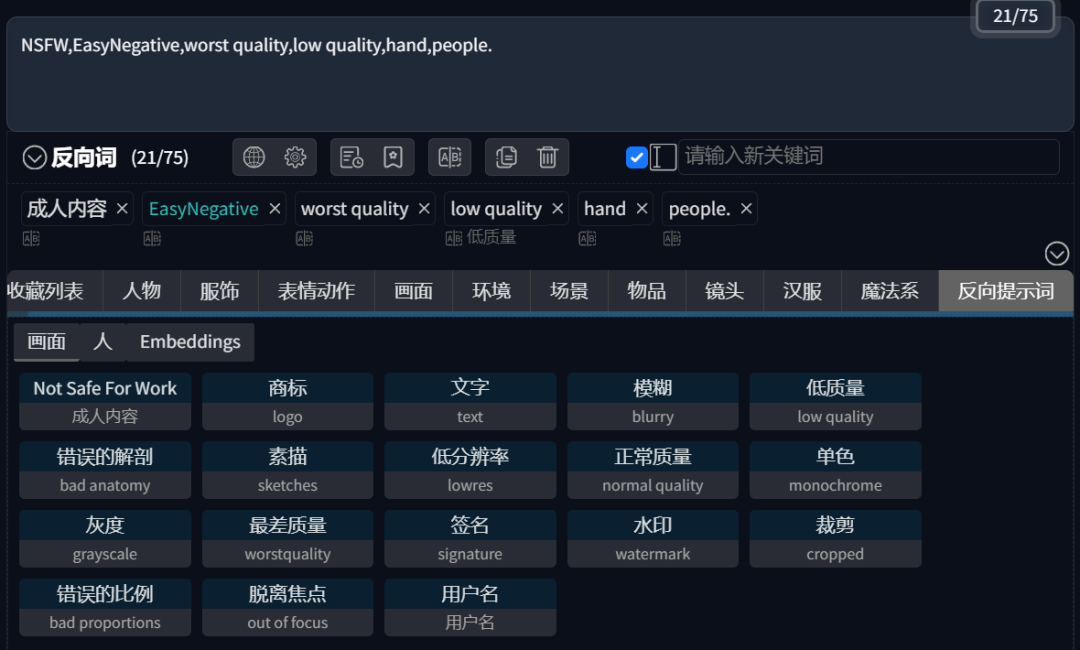
PS: The commonly used EasyNegative keyword actually has a model. It needs to be downloaded and placed in the "embeddings" directory under the software root directory.
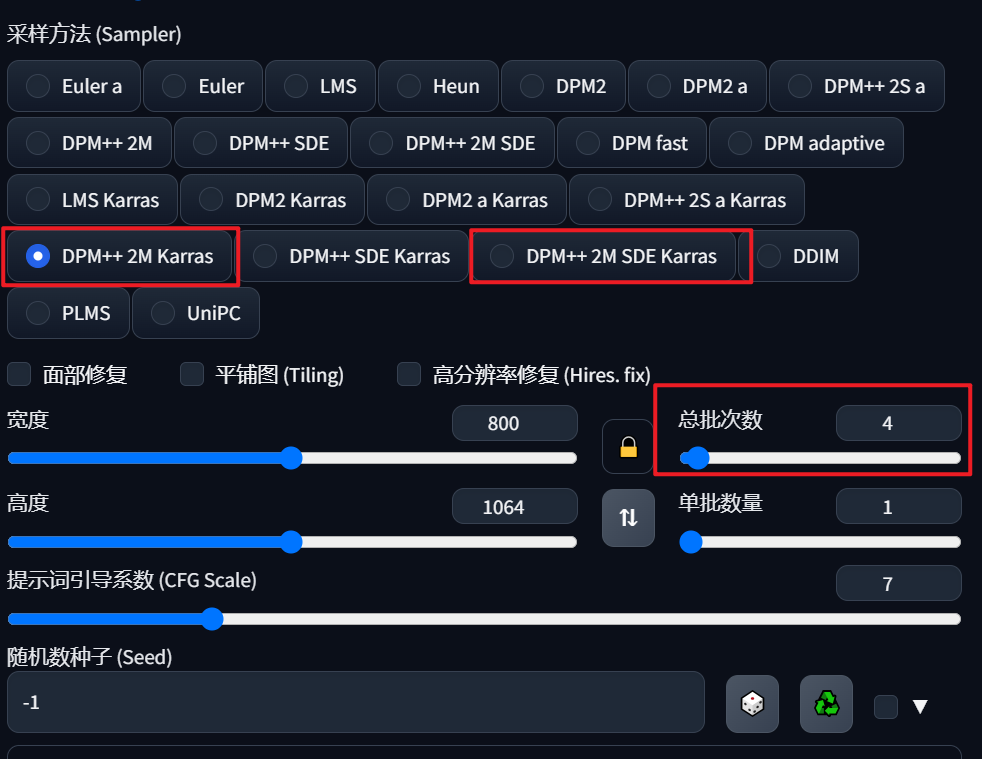
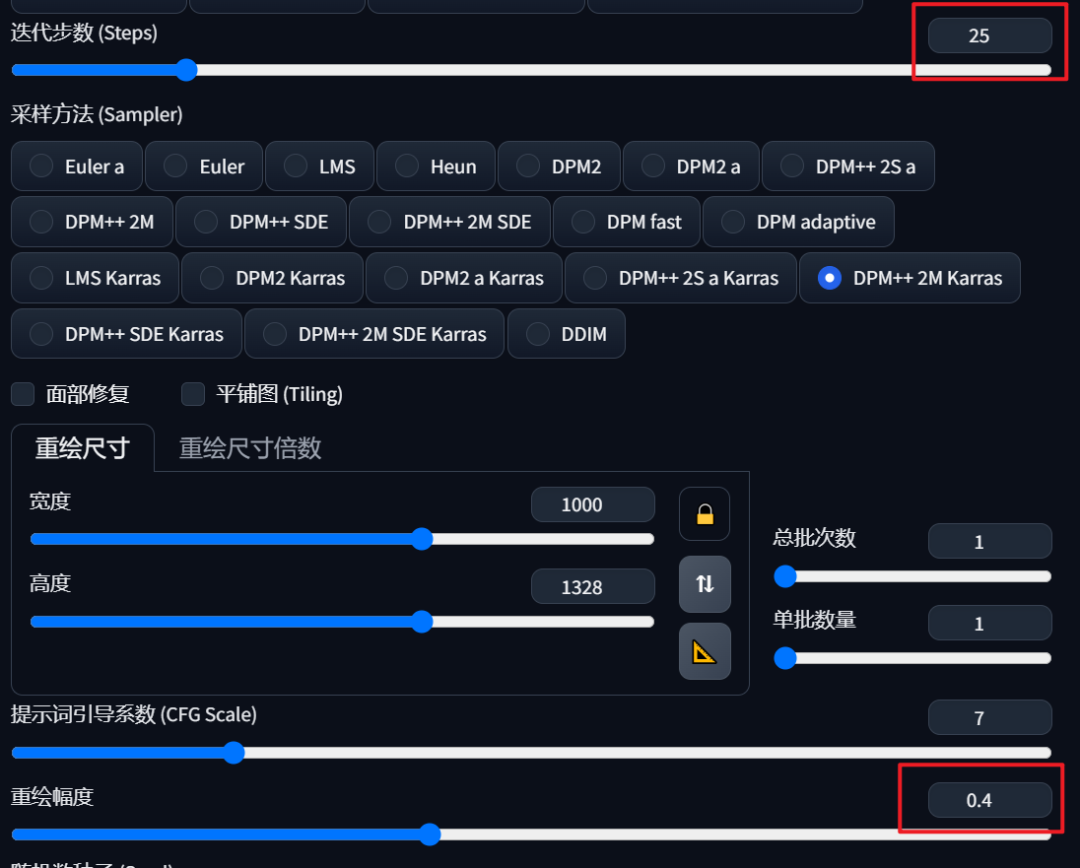
The sampling method can choose DPM++ 2M Karras or DPM++ 2M SDE Karras. You can set the number of times to generate multiple images to see the final effect.
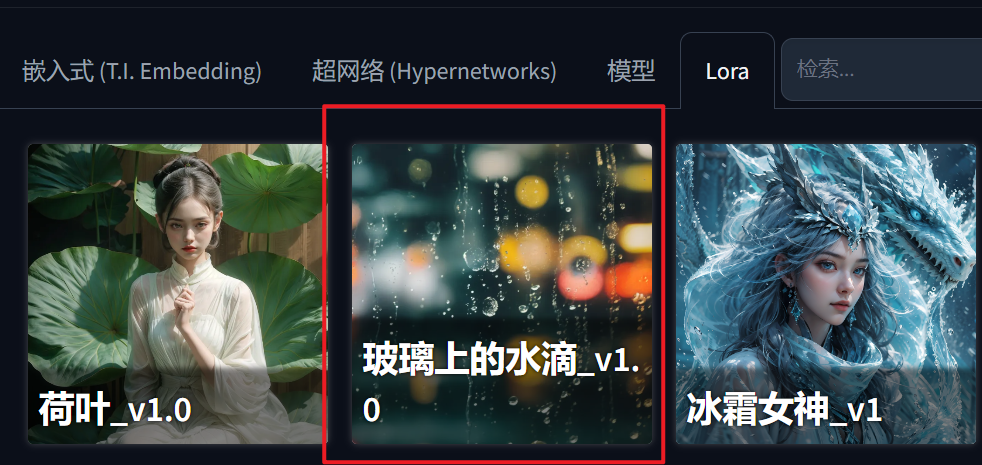
Click "Generate", and we will see that the effect has already appeared, but the dew is not obvious. Here we can add a dew-related Lora to control it.

Under the Lora model, click on the model we want, set the model weight, and add the trigger keyword "water_drop". Then add the "depth of field" keyword to create a sense of depth for the text.
Final keywords: masterpiece, best quality, dew, plant, water, green, lora:aki:0.5>, water_drop, depth of field.
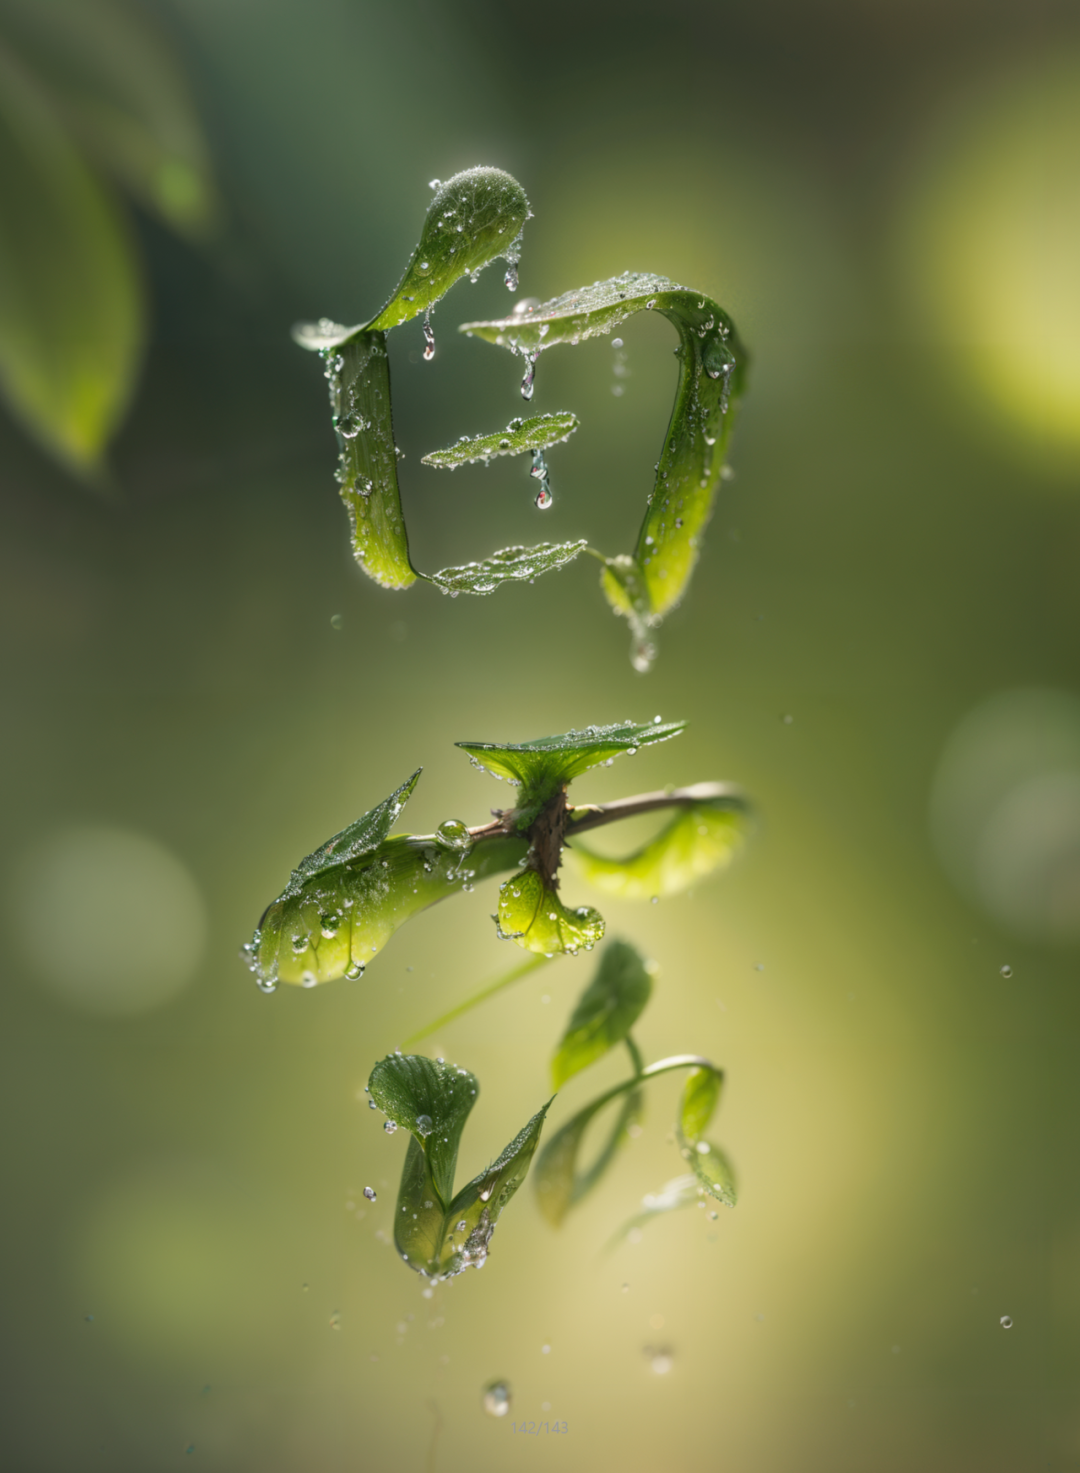
Click "Generate" again, and you will notice that there are more water droplets on the text. You can generate several images at once and choose the one with the most satisfying effect:
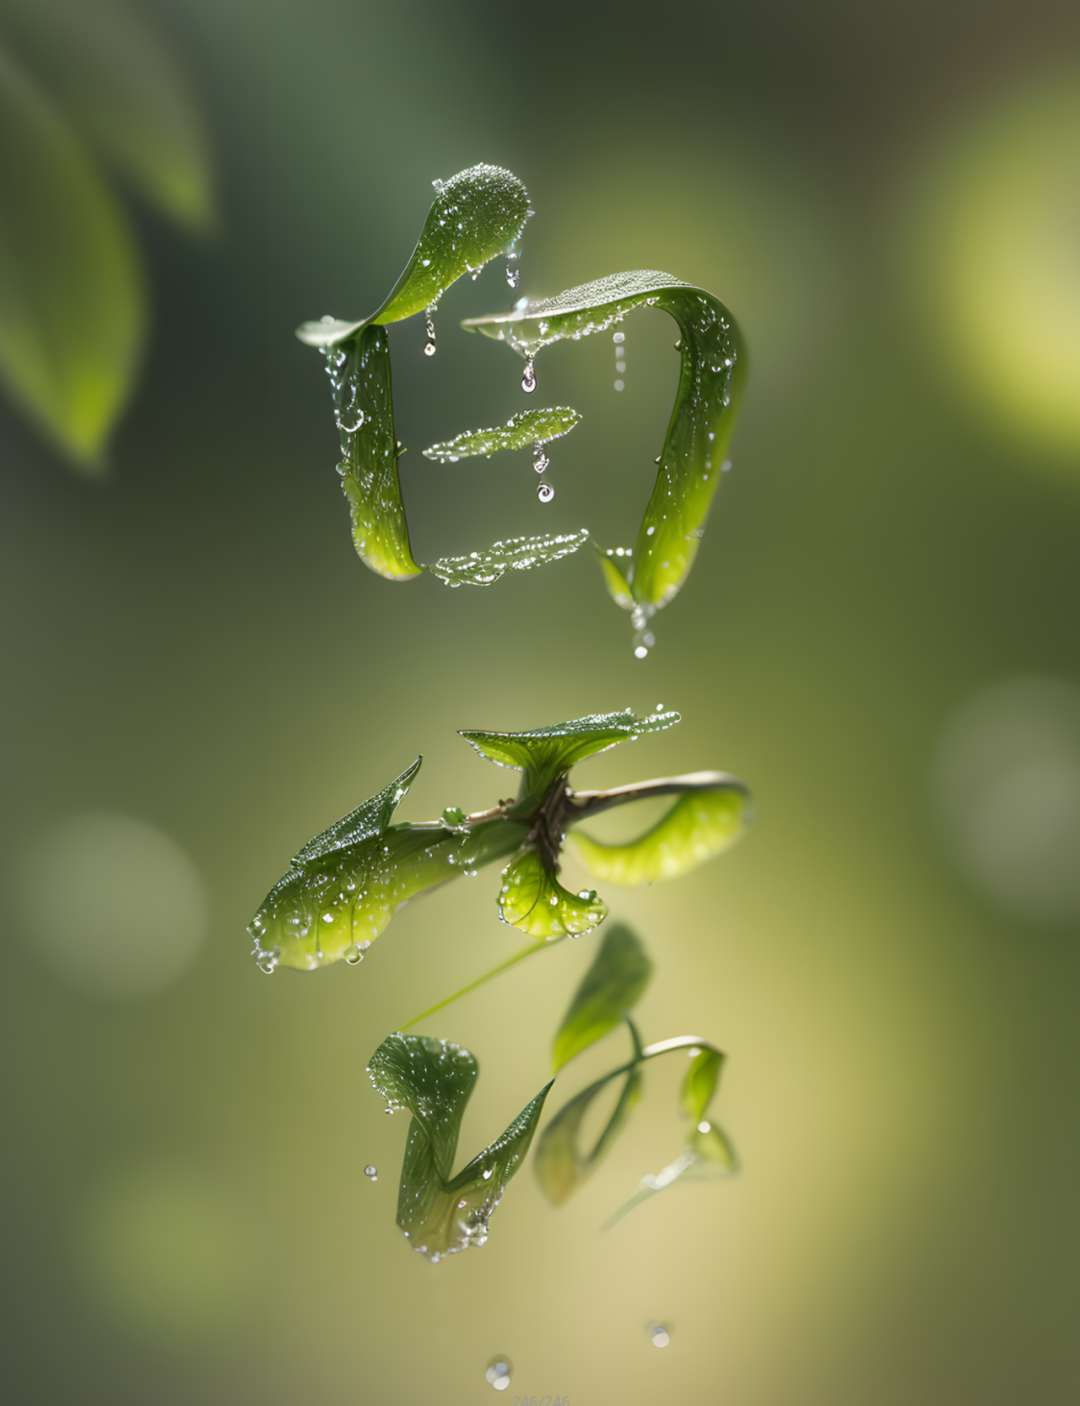
Image enlargement processing
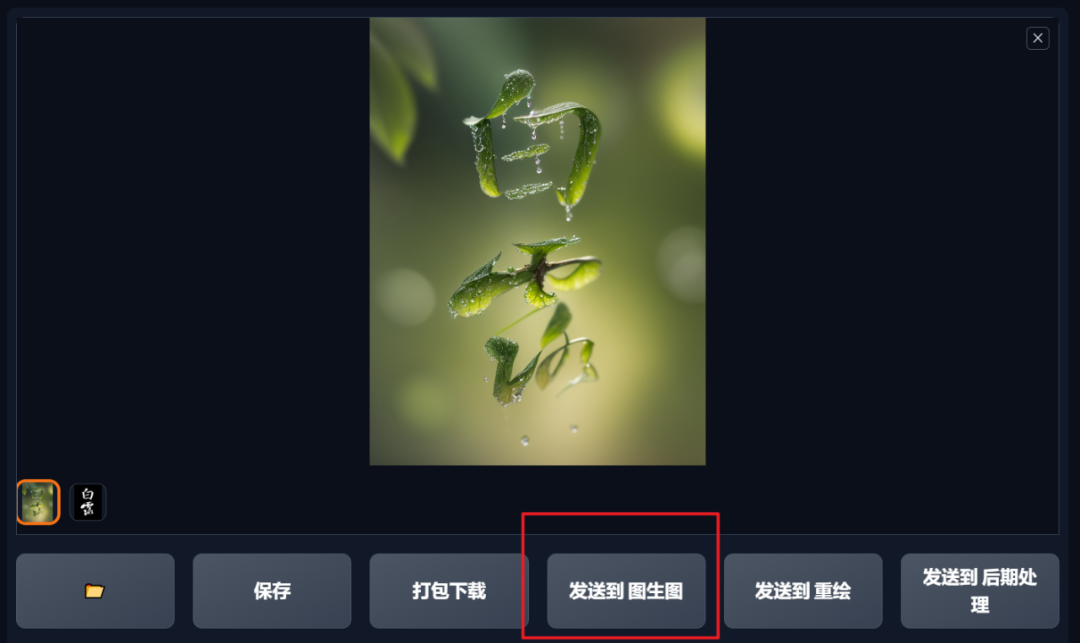
Because the generated image size is small, if we achieve the effect we want, we can find the image at the bottom and click "Send to Image Generation" for enlargement processing:
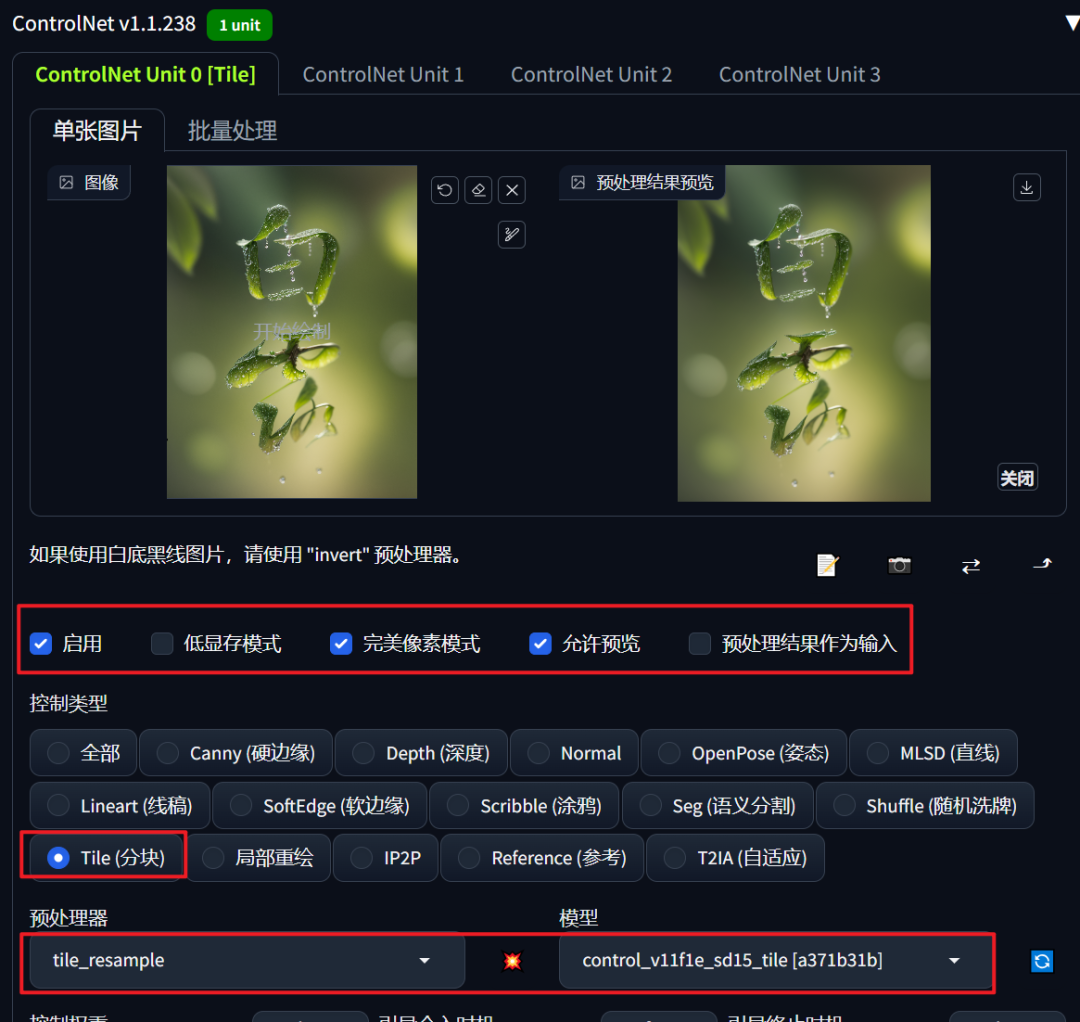
In the Image Generation, open ControlNet, drag the generated image into ControlNet, check "Enable, Perfect Pixel, Allow Preview", and choose the Tile control type. The preprocessor and model will be automatically loaded, as shown in the following image:
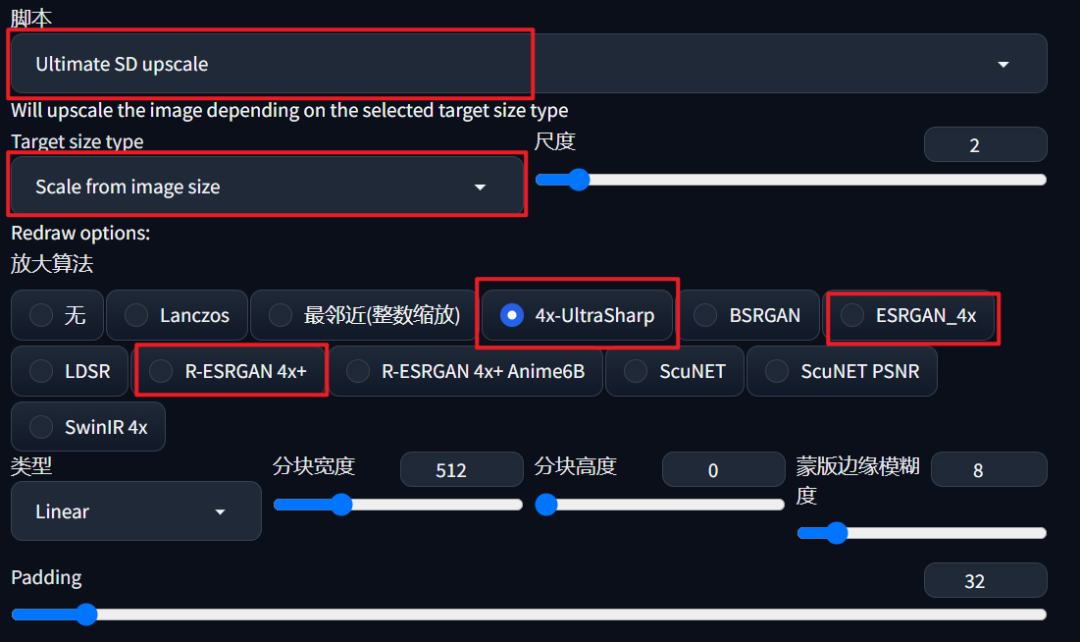
Then select the "Ultimate SD upscale" enlargement script in the script, choose "Scale from image size" as the type, and select the 4X-ultrasharp algorithm. If this option is not available, you can choose another one and install the algorithm model later in the /models/ESRGAN directory:
If you can't find the enlargement script, you can install it from the website by pasting the following address. After installation, restart the web UI.
Enlargement script: https://github.com/Coyote-A/ultimate-upscale-for-automatic1111.git
The keywords remain the same, and the iteration steps can be increased to around 30, and the redraw amplitude can be reduced to around 0.4:
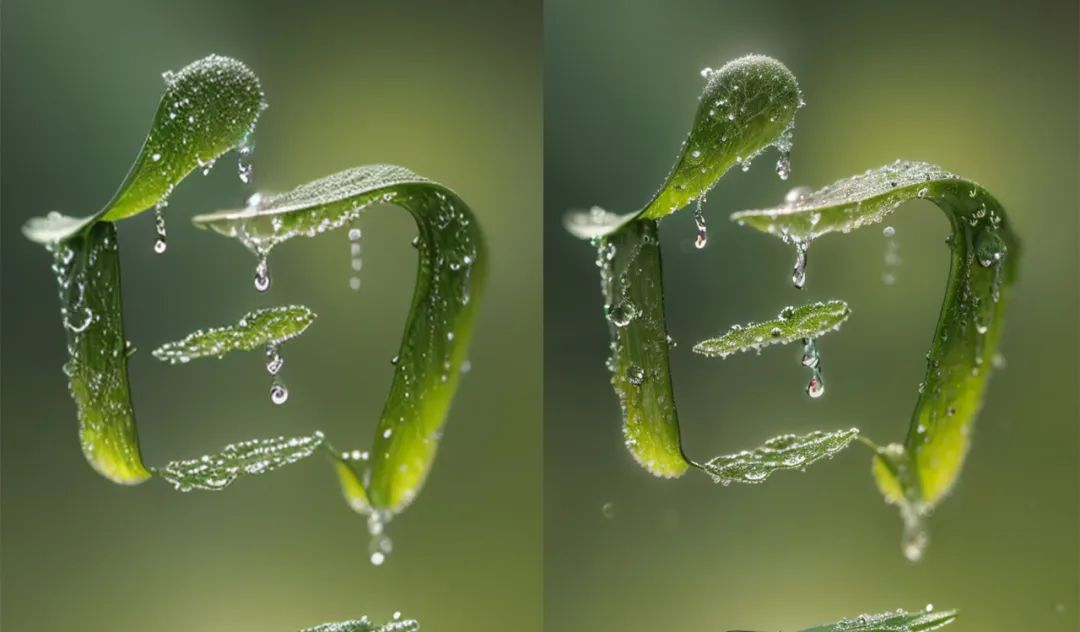
Click "Generate", and the redrawing will start again. The image details before and after are compared in the following image. You can see that the texture of the leaves in the upper left corner is clearer. If you want to add more details during redrawing, you can increase the redraw amplitude value:
Left is before redrawing, right is after redrawing:
Additional knowledge: If you don't want to install SD but the image is not clear and you want to enlarge it, I recommend a free enlargement software "upscayl". Just drag the image into it and click "upscayl". It supports batch processing of images, and there are multiple algorithms in step 2 for you to test the effect:
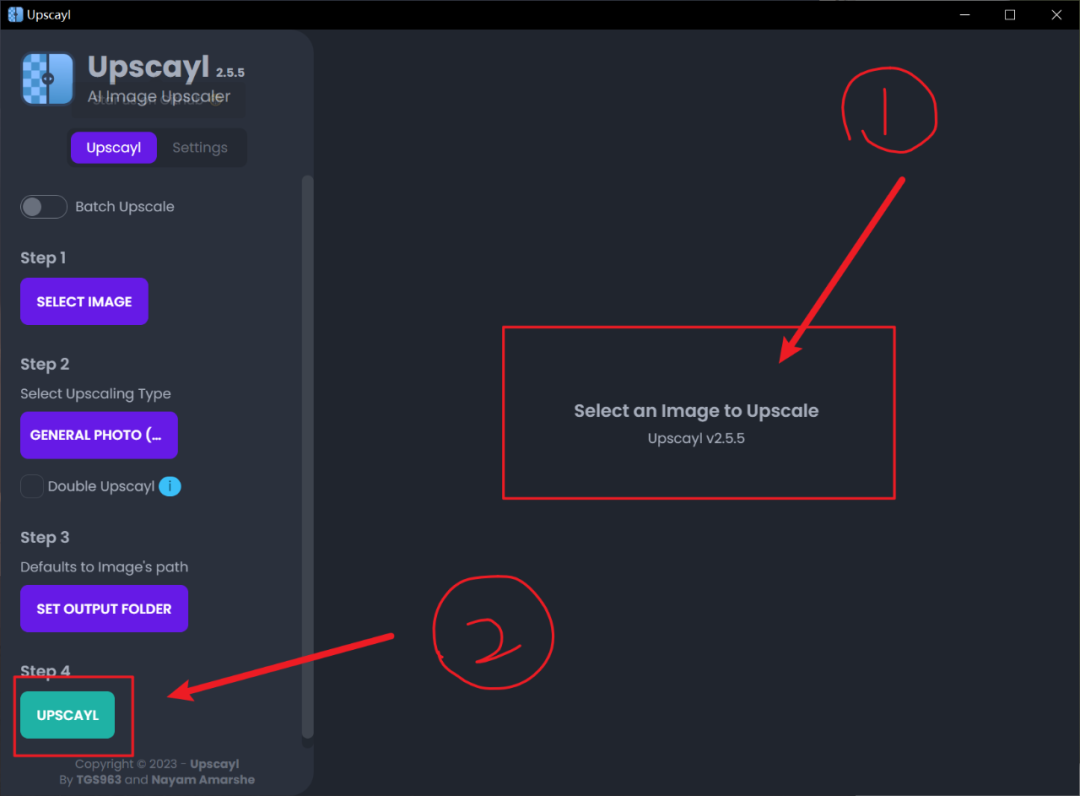
Official website: https://www.upscayl.org/
Comparison before and after enlargement with "upscayl" (left before, right after):

Conclusion
Finally, we can choose a favorite image from the generated images and do some simple layout. Here, I'll just make a simple demonstration without special layout:
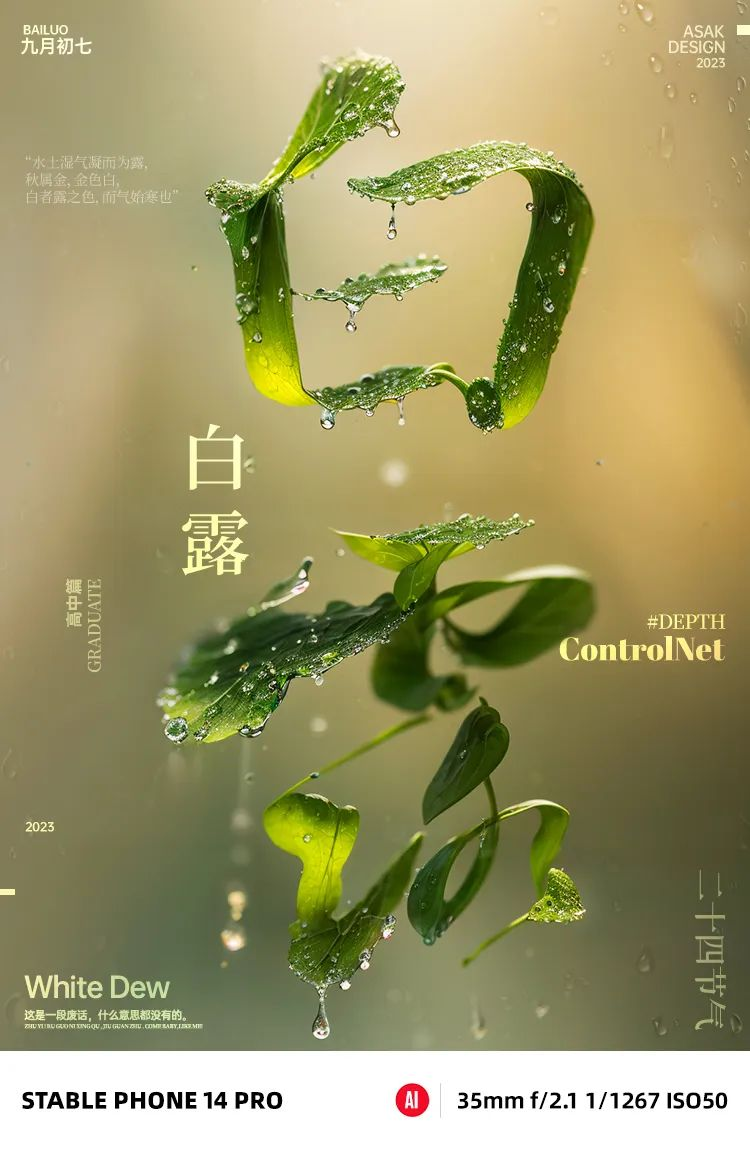
All graphics and elements are auxiliary to design. The specific finished product depends on your own ideas. You can try to generate different effects on your own. This case is now concluded.
免责声明:本文章仅代表作者个人观点,不代表本平台的立场和观点。本文章仅供信息分享,不构成对任何人的任何投资建议。用户与作者之间的任何争议,与本平台无关。如网页中刊载的文章或图片涉及侵权,请提供相关的权利证明和身份证明发送邮件到support@aicoin.com,本平台相关工作人员将会进行核查。


