撰文:Denise、Bbo,Biteye
最近刷 X 看到 Clawdbot 大家都在用 AI 代理干各种事,突然觉得文科生也可以用「vibe」方式玩代码了,于是开始了这个零基础实战。
Vibe Coding 被视为一种「需求即代码」的新范式,甚至被寄予「让非程序员也能构建工具」的期待。
然而,一个现实的问题始终存在:当技术门槛被降低,真正的落地能力是否也随之而来?
为了回答这个问题,我以一个完全没有代码经验的使用者身份,完整体验了三款主流 Vibe Coding 工具。
过程并不顺利:踩坑、翻车、反复推翻重来,但也正因为如此,我摸清了哪些地方最容易出问题,以及该如何绕开这些坑。
本文并非工具测评,而是一次从认知到实践的真实记录。
一、概念理解:什么是 Vibe coding?
这是一种「只管提需求,不管写代码」的新型开发模式。
这个概念最早由前 OpenAI 联合创始人 Andrej Karpathy 提出,他的原话是:
「这是一种新的编程方式,我称之为 Vibe Coding。你完全交给了感觉(Vibes),拥抱指数级的效率增长,甚至忘记了代码的存在。」
在 Vibe Coding 的模式下,你不再是「建筑工」,而更像是一个「产品经理」甚至是「甲方爸爸」。
你的任务就是准确地告诉 AI:「我要盖个房子,这里要有落地窗,那里要有个游泳池。」
如果不满意,你就说:「感觉不对,再改改。」
这就是 Vibe!
二、避坑指南:Vibe Coding 的安全红线
在开启 AI 编程的大门前,必须先锁好你的「金库」。很多新手在与 AI 对话时,会不自觉地把敏感信息发给 AI,这是极其危险的。
1. 绝对不能泄露的三类数据
- API Key: 相当于你各类平台的「储值卡」,泄露后额度会被瞬间刷光。
- 私钥 / 助记词: 绝对、永远、不要发送给任何 AI 或写在任何代码文件中。一旦泄露,你的链上资产将归零。
- Cookie 数据: 某些教程会教你从浏览器获取 Cookie 来实现自动化,但 Cookie 包含了你的登录状态,泄露后别人可以无需密码直接登录你的 Twitter、Discord 甚至交易所账号。
2. 核心原则:环境隔离,数据脱敏
永远不要把 API Key 或敏感信息直接写在代码或提示词里。
正确的做法是使用 「环境变量」,让代码去读取系统的变量名,而不是直接读取密钥内容。
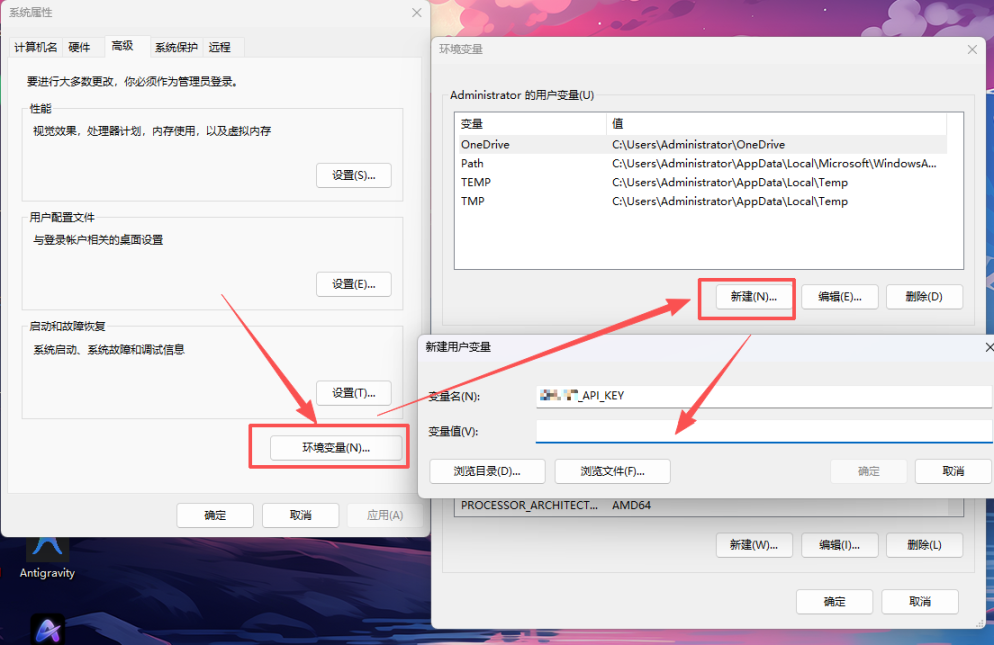
Windows 系统的配置步骤如下:
- 键盘按下 win+s ,输入搜索 【环境变量】
- 新建变量
- 输入变量名、变量值保存
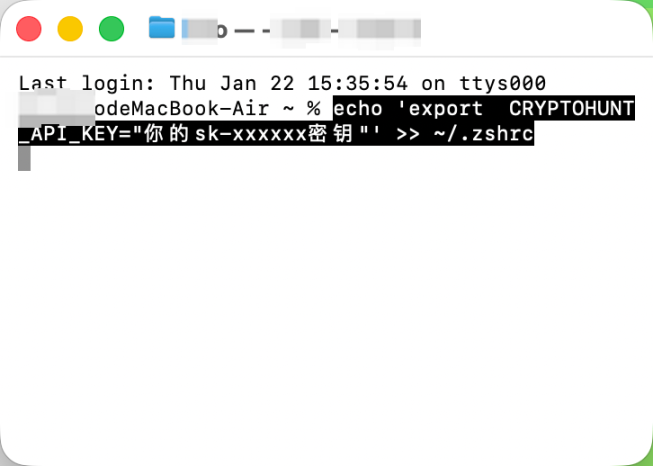
MacOS 系统的 配置步骤如下:
- 键盘按下 Command + 空格键,搜索【终端】并打开。
- 在弹出的黑框里,复制粘贴以下命令(注意替换你的真实 Key),然后回车:
- echo 『export CRYPTOHUNT_API_KEY=「你的 sk-xxxxxx 密钥」』 >> ~/.zshrc
- 让配置立即生效,继续输入并回车:source ~/.zshrc
- ( 可选 ) 验证是否成功,输入:echo $CRYPTOHUNT_API_KEY,如果屏幕打印出了你的密钥,说明配置成功。
三、实战(翻车)复盘:三款工具,三种体验
理论讲完,我们直接进入实战。为了找到最趁手的工具,我帮大家试了三款主流工具。选择它们的原因,是因为它们分别代表了当前 Vibe Coding 的三种主流形态:
- Google AI Studio:代表「极速生成原型」的轻量路线
- Antigravity:代表「AI 代理 + 本地全栈开发」的工程路线
- Lovable:代表「对话即应用」的抽象路线
如果你只想知道哪种工具最适合零基础直接落地,可以直接跳到第三个工具 Lovable;如果你想少走弯路,建议完整看完这一节。下面开始按顺序复盘。
1.Google AI Studio
定位:适合个人开发者、初创团队
体验:主打「快」和「免费」,让你几分钟内就能验证一个 AI 创意
官网:https://aistudio.google.com/apps
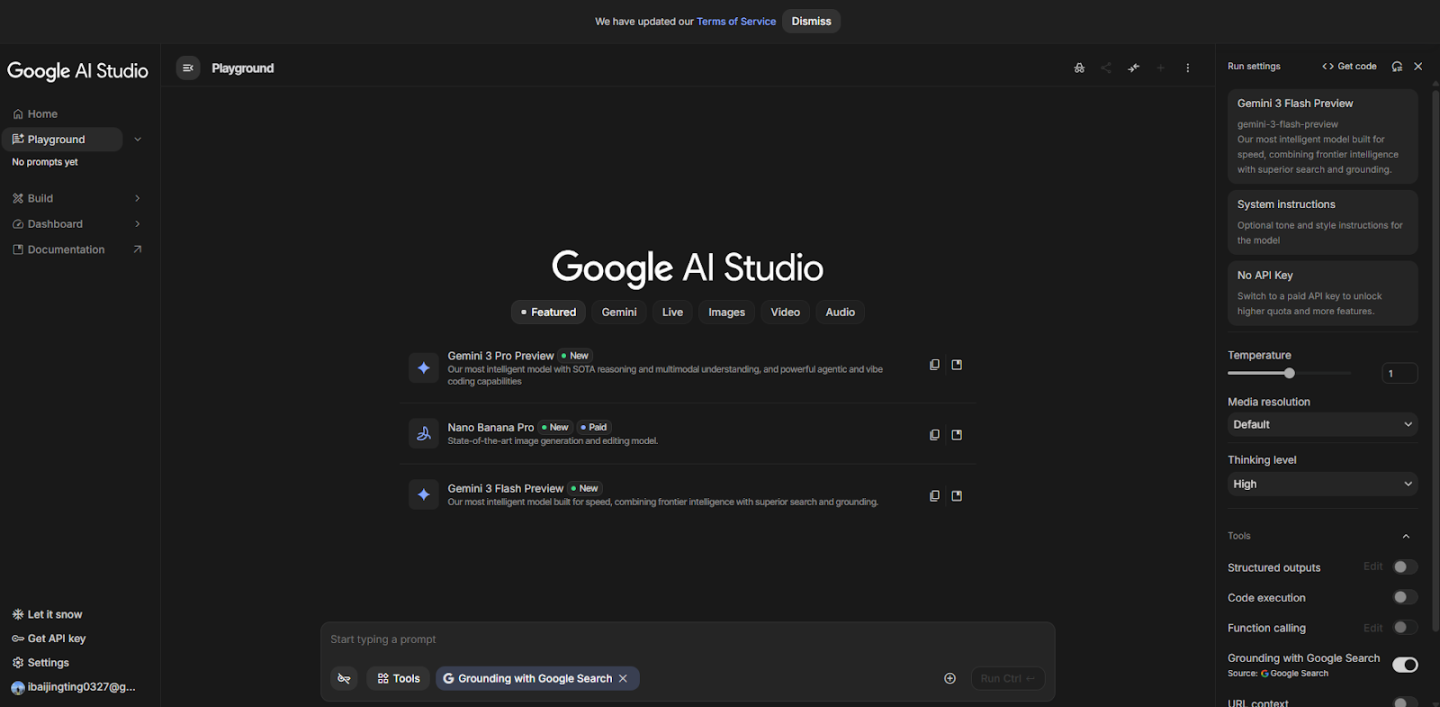
第一次用它,是在圣诞节。大家都在做赛博圣诞树,我也体验了一把。随手丢了一个提示词,仅仅 5 分钟,它就生成了一个非常唯美的 3D 页面,粒子随着手势流动,效果极其丝滑。
这让我不禁感叹时代真的变了。想想以前理工男想哄女孩子开心,熬大夜写一串代码,运行半天蹦出一个跳动的爱心,就觉得很帅了。而现在?你完全可以交给 vibe coding,他分分钟就能把情绪价值拉满。
在成功案例的加持下,我开始「膨胀」了,于是开始干正经事:调用 Cryptohunt API 做一个推特数据看板。
我信心满满地把 API 文档投喂给它。 开始一切顺利、后端逻辑秒通,数据也成功抓取到了。我心想:就这?
然而,当我要求它把数据漂亮地展示在前端时,噩梦开始了:
- 图表不显示? 它改代码
- 显示了但不全?它又改了代码,结果交互坏了
- 交互修好了?这会儿 API 数据又不加载了
我就这样陷入了无限的「修复 Bug—-- 产生新 Bug」的循环中。花费 2 天我放弃了。
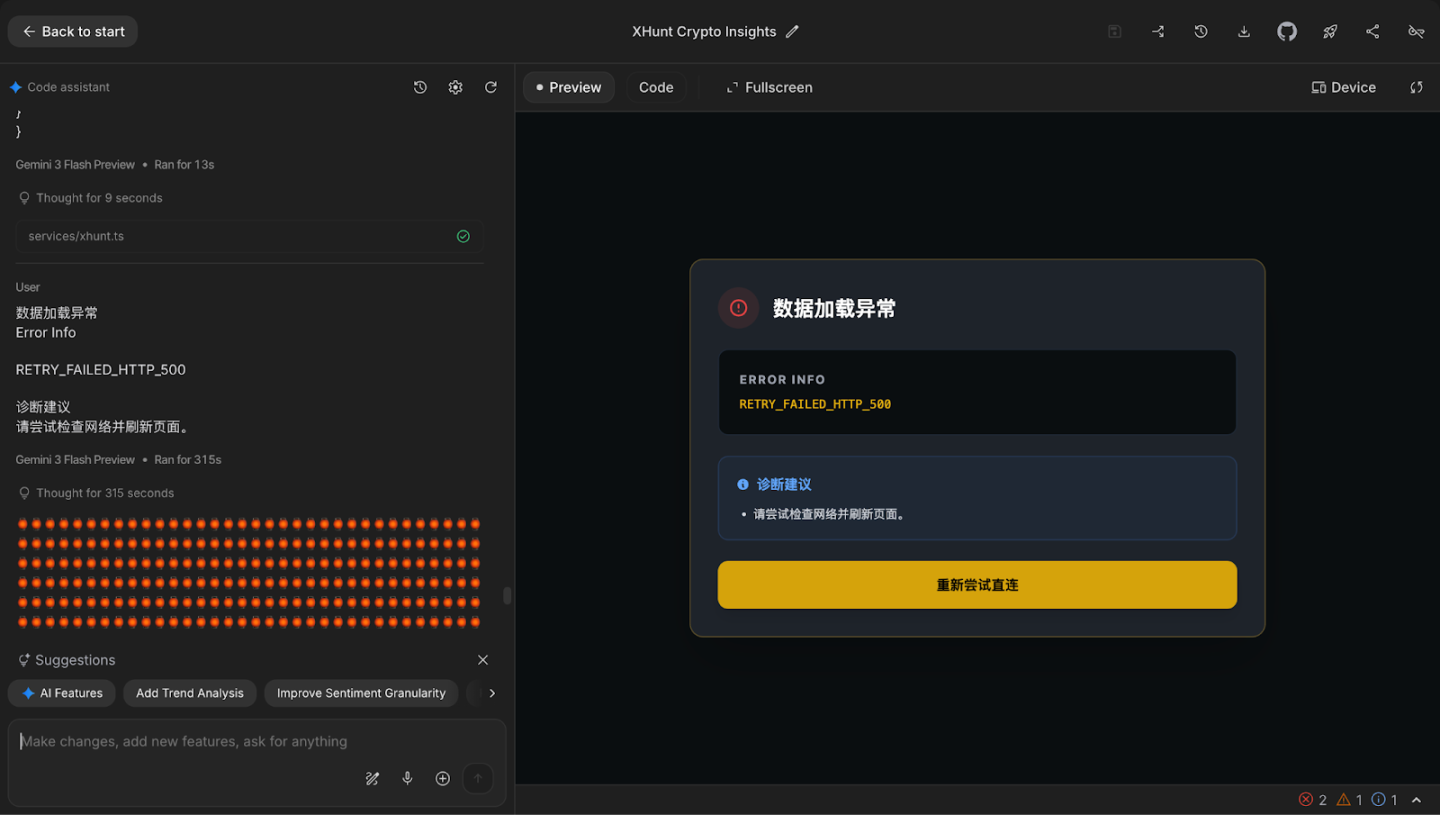
最终展示图(ai 已经开始给我鬼画符)
踩坑总结: Google AI Studio 是个偏科生。 搞搞创意、做个单页面 Demo,它简直是神。 但一旦涉及到前后端深度集成(比如 API 数据流转 + 复杂前端展示),它很容易顾头不顾腚。如果你完全不懂代码逻辑,很容易像我一样卡在前端展示的死胡同里出不来。
2.Antigravity
定位:一款集成多模型切换的代理式全栈开发工具
特点:多模型切换、任务拆解、自动测试
官网:https://antigravity.google/
实际使用过程中,还没开始写代码,我就差点被它的登录劝退。它不像大多数工具那样,打开网页就能直接上手,而是对账号和网络环境有着相当严格的要求。
账号的限制不是由你当前网络 IP 决定,而是由 Google 账号本身「关联的国家 / 地区」决定。地区设置不在支持名单中(例如中国大陆、香港),登录就会直接被系统拒绝。我更改地区的请求也被驳回了好几次。
一整套流程走下来,只能用一句话形容:人都麻了。
在经历了 3 个账号被封以及多次环境切换后,我找到了邪修登录方式:Antigravity tools
1)开局需要设置美区 ip+tun 全局模式
2)下载 antigravity tools。来自推特网友的分享链接:https://x.com/idoubicc/status/2004848130693759213
3)下载完成之后,添加账号开始 OAuth 授权
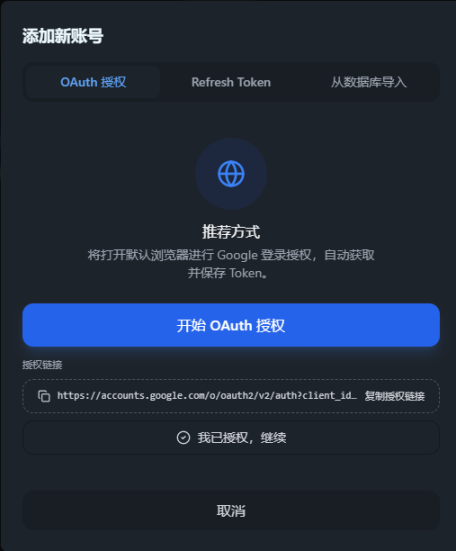
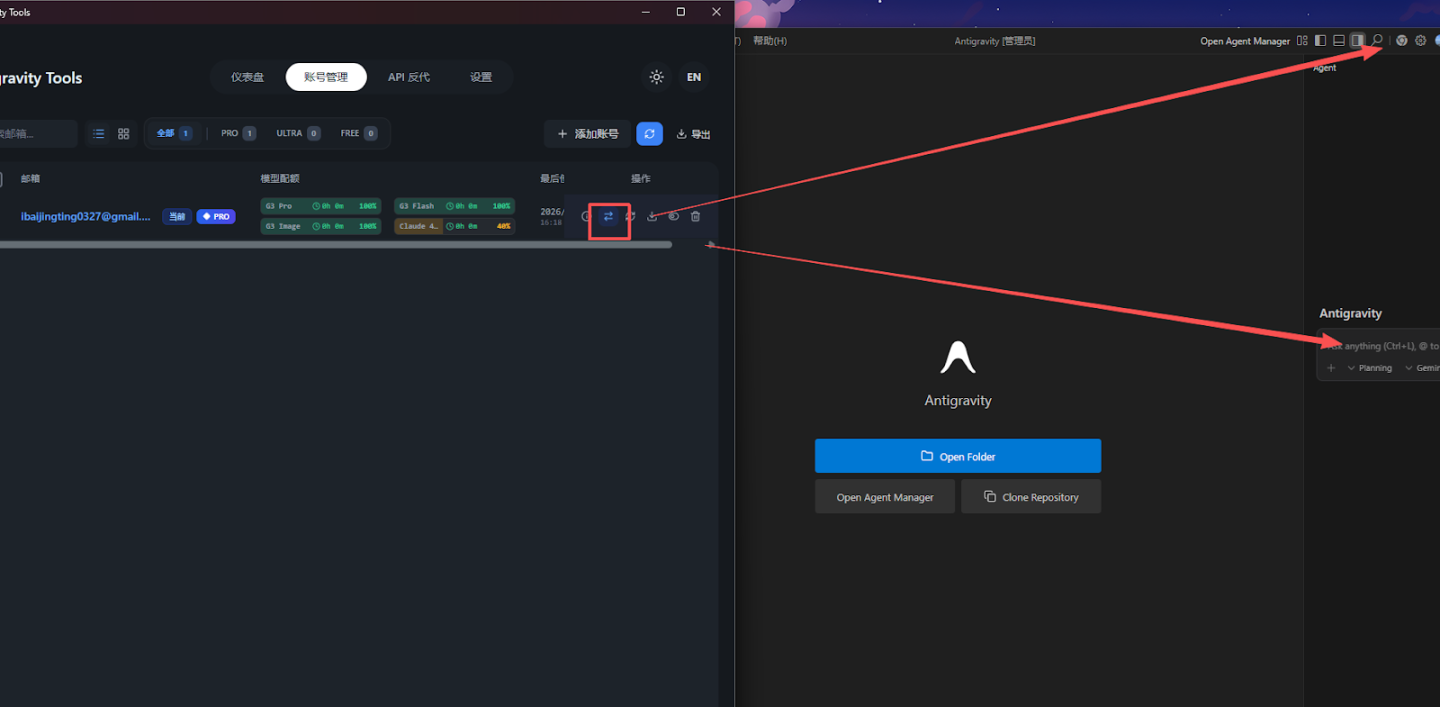
4)授权成功即可跳转登录页面,还可以直观的看到你的模型配额
(风险提示:Antigravity Tools 是一个开源项目,方便将 Antigravity 模型接入 Claude Code 等工具。但在 Vibe Coding 过程中,建议将操作环境与资产钱包或重要账户的电脑隔离,以降低潜在安全风险。)
进到工具内部后,我也总结了两个对小白极其重要的小技巧:
- 安装中文插件:左侧扩展栏搜索 Chinese,安装简体中文语言包,重启软件。这一步能把界面变成中文,大幅降低理解成本。
- 注入「全局人设」 :Antigravity 允许你设定一个「全局规则」,让 AI 无论何时都必须遵守。操作方法:点击右侧 Rules 图标 → 选择 + Workspace(添加工作区规则)直接粘贴一段「全局规则提示词」,可以强制它使用中文,并显著提升代码输出质量。
(提示词内容较长,这里不展开,如果有需要我可以放在评论区)
然而,即便成功完成登录和基础配置,真正开始运行代码时,我还是被现实泼了一盆冷水。它不能像 Google AI Studio 那样即刻预览。让我再下载一堆配套的预览软件例如 Node.js 、VS code 或者是只能在 html 里看效果。 而且,大模型的回复速度肉眼可见的慢。每次我提完需求,屏幕那头就在转圈。
但 Antigravity 有一个非常惊艳的功能:自动测试。写完代码后,它会启动视频预览,像真人一样去点击网页,检查逻辑是否能跑通。看着 AI 自己在屏幕上点来点去,确实有一种「未来已来」的震撼感。
我让它尝试做的项目是: 「一个加密货币 Alpha 信号捕捉器。利用 Cryptohunt API 监控推特数据,自动抓取推文中的 Ticks,统计大家都在讨论什么代币,并按讨论热度排个序。」
现实是骨感的。 尽管它看起来很努力地在帮我写代码、帮我测试,但在对接 API 这个核心环节,我依然碰壁了。 可能是因为本地网络环境的复杂性,也可能是 AI 对 API 文档的理解偏差,数据始终对接不上。
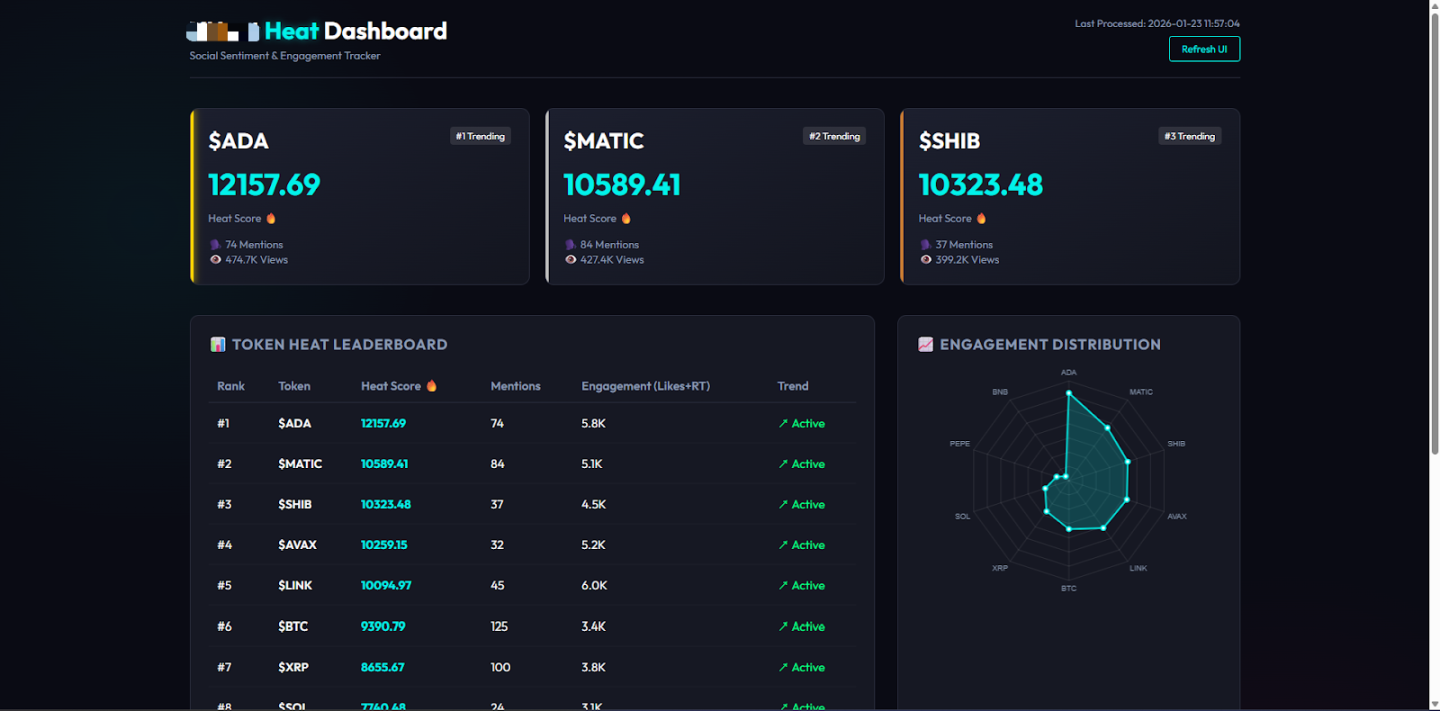
demo:模拟数据的展示效果
看着终端里一片红色的报错,和 AI 幻觉「这次一定行」,我意识到:全栈虽好,但由于网络和环境的黑盒问题,想做成一个真正能用的工具,对小白来说门槛依然极高。因为 Antigravity 默认你已经是开发者。
3.Lovable
定位:「对话即应用」平台
特点:无需配置本地环境,所想即所得
官网:https://lovable.dev/
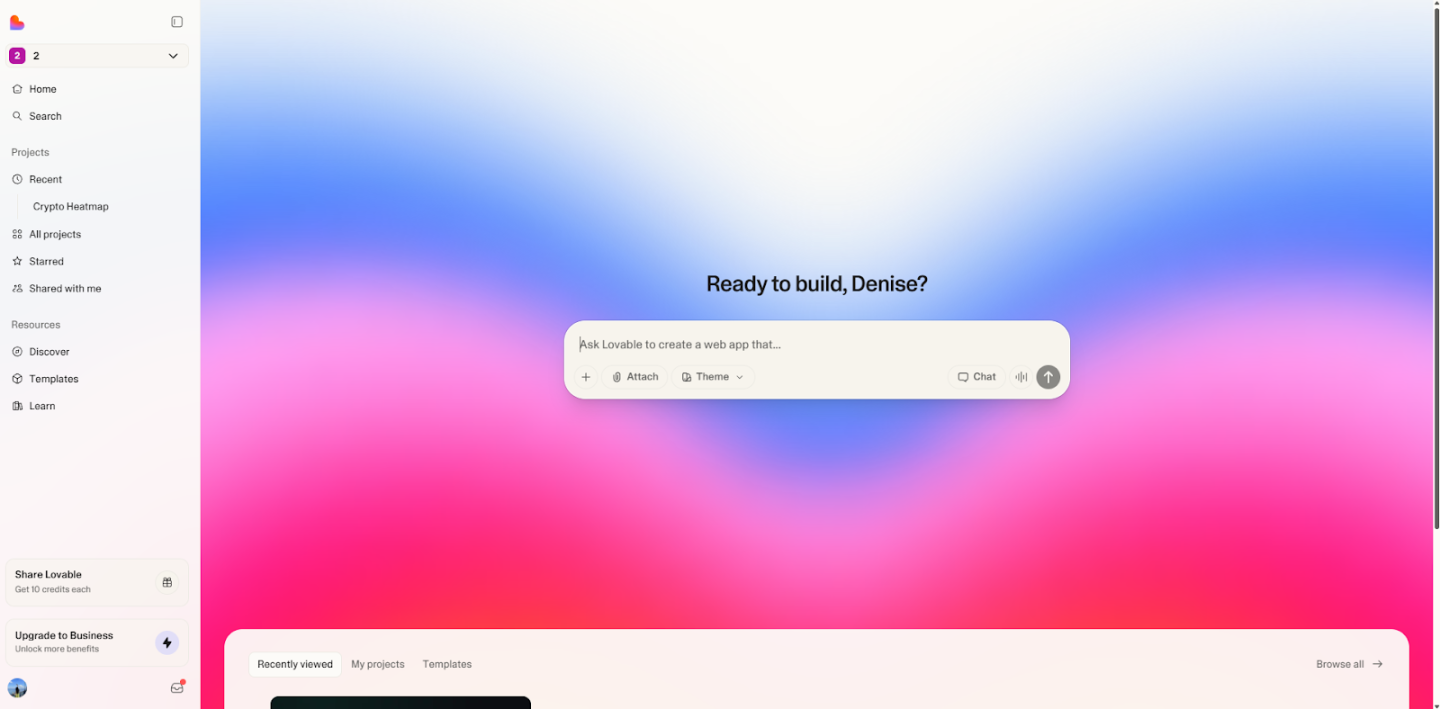
lovable 的使用让我体验到了什么是真正的甲方爸爸,难道是因为只有他需要付费吗?(tips:在某鱼上花了 15RMB 购买了 100credits,制作完成还没有用完)
在 Lovable 上,一行代码都没改过,就搞定了下面的 Crypto Twitter 监控神器 -----Crypto Pulse ( 加密脉搏 ) 监控看板
是的你没看错,这次我终于成功了。
在线体验地址:https://tweet-whisperer-dash.lovable.app/
「功能详解」
A. 全景数据与 AI 总结
进入首页,映入眼帘的是内容的「体温计」:
实时数据卡片:顶部展示了 24 小时内推文总数、互动总数、活跃 KOL 数、 市场情绪指数。不用看具体内容,并对比前 24 小时数据,瞄一眼红色还是绿色,就知道今天市场是恐慌还是贪婪。
AI 智能摘要:这是最省时间的功能。系统集成了 Gemini AI,它会自动阅读过去几小时成千上万条推文,然后为你写出一段市场简报。
B. 趋势雷达
不想错过下一个百倍币?
智能分类:自动筛选热点并分为 Topic ( 话题 )、Project ( 项目 ) 、 Token ( 代币 ) 和 KOL
涨跌风向标:每个标签旁边都有 24 小时提及次数的变化率(上升 / 下降)。哪里讨论量暴涨,哪里就有机会。
C. 智能信息流
告别杂乱的时间线,这里有四个经过清洗的 Tab:
精华:由 AI 二次筛选的高价值内容,剔除无意义的灌水。
热门:当前互动量(点赞 + 转发)最高的爆款推文。
大 V:只看行业大佬(如 Elon Musk, Vitalik 等粉丝数>100K)的实时发言。
最新:CT 相关账号的最新发表推文,时刻发现新内容。
* 体验细节:支持按地区筛选(英语区 / 华语区),点击卡片可直接跳转推特原文。
「使用提醒」因为现在使用的是我个人的 API Key,数据回传会消耗 API Credits,额度有限,建议大家速速体验。
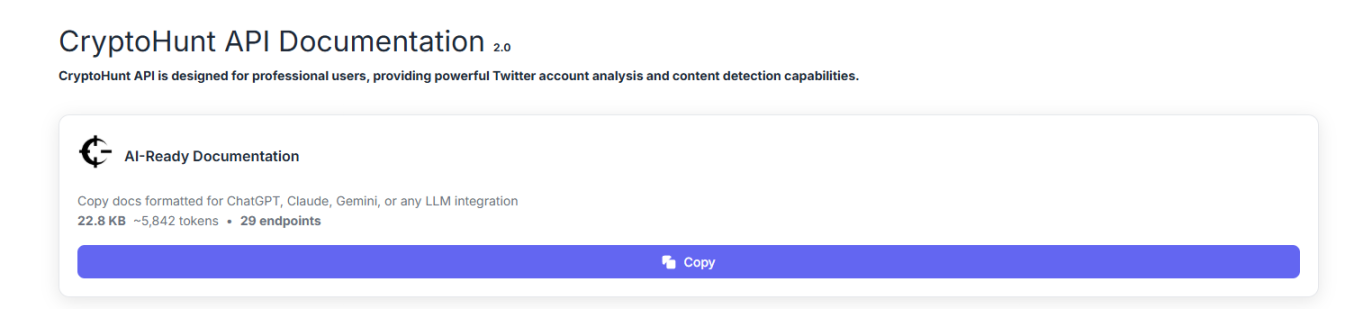
四、 Cryptohunt API 实用攻略
在 Vibe coding 的过程中,我选择了性价比较高的 Cryptohunt 数据库。Coding 没有整的门清,倒是把 API 摸透了,在这里在写一下攻略。
官方链接:https://pro.cryptohunt.ai/
1.精准投喂
很多小白会直接把几万字的 API 文档丢给 AI,AI 也会晕。
- 错误示范: 这是 API 文档,你看着办。
- 正确示范: 我要做个代币监控功能。请阅读 Cryptohunt API 中关于 post /tweet/mention_tweets 的部分。告诉我如何拿到最近 1 小时的数据?
prompt 示例:「请调用 /tweet/mention_tweets 接口,搜索 ticker 为 SOL 的推文。限制时间为最近 24 小时。帮我过滤出互动量(点赞 + 转发)最高的前 5 条,看看大家对 SOL 的情绪如何。」
2. 调试神器
在 Vibe Coding 的过程中,最让人抓狂的情况就是:我点击了按钮,但是屏幕上没有任何反应。 这时候,小白往往会陷入自我怀疑:是 AI 代码写错了?是网络卡了?还是 API 挂了?
这就可以打开 API usage 刷新:
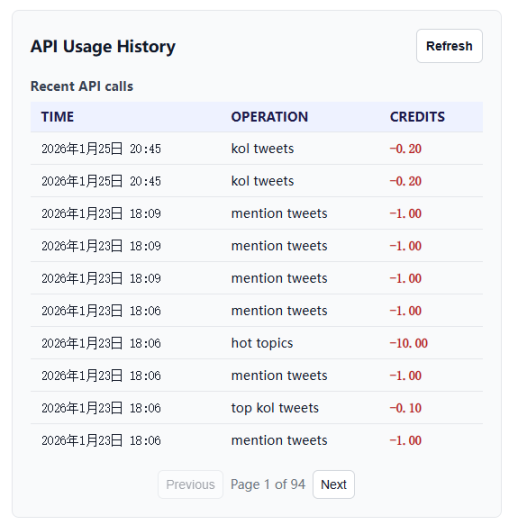
- 有记录,扣了分: 说明 API 调用成功了!数据已经顺利发回给你的电脑。 这是一个前端展示问题。可以告诉 AI:「数据已经拿到了,但是屏幕没显示,请检查渲染代码。」
- 完全没记录: 说明请求根本没发出去! 那么就是一个逻辑 / 网络问题。去告诉 AI:「点击按钮没有反应,请求没有发送,请检查点击事件。」
把结论直接丢给 AI,它修的速度会更快。在 Vibe Coding 的过程中,真正消耗精力的已经不再是写代码,而是判断问题出在哪里。
当我们把繁琐的语法和实现细节交给 AI 后,开发的重心就回归到了对信息的掌控上。
因此大家都会说,Vibe Coding 的尽头,不是代码,是数据。
五、写在最后:掌握 Vibe Coding 的两个核心玩法
经历了从 Google AI Studio 的「试水」,到 Antigravity 的「折磨」,再到 Lovable 的「爆发」,我终于明白: 工具只是手中的剑,你的 Vibe 才是心中的道。
大家在尝试 Vibe Coding 时,请务必记住这两个核心要点,它们比任何代码都重要:
1. 敢想:想象力是你唯一的「天花板」
在 Vibe Coding 时代,技术壁垒已经崩塌了。 以前我们不敢做工具,是因为怕写不出来,现在通过实战证明,只要逻辑通顺,AI 都能写出来。
不要只做一个「搬砖工」,要做一个「架构师」: 大胆去构思那些你以前想都不敢想的产品。是监控全网数据的雷达?还是自动套利机器人? 你需要做的,就是把脑海中那个模糊的「想要」,变成一个清晰的「蓝图」。
2. 会说:提示词(Prompt)就是你的源代码
很多小白失败的原因,不是 AI 笨,而是你太「客气」或者太「含糊」。
模糊需求=模糊结果
拒绝模糊: 不要对 AI 说「帮我做一个好用的网页」。(AI:什么是好用?)
拥抱精准: 要像我做看板时那样说:「我要一个深色模式的 Dashboard,顶部要有这四个数据卡片,中间要调用这个 API,右边要用 AI 自动总结……」
记住,你现在是甲方爸爸。 甲方的威严来自于明确的需求和不厌其烦的反馈。 如果 AI 做错了,不要怀疑自己,直接告诉它:「不对,重来,我要的是 A 不是 B。」
如果你已经读到这里,说明你大概率已经具备了用 Vibe Coding 做出工具的能力。
别犹豫了——快把你的 Vibe,变成 Coding。
免责声明:本文章仅代表作者个人观点,不代表本平台的立场和观点。本文章仅供信息分享,不构成对任何人的任何投资建议。用户与作者之间的任何争议,与本平台无关。如网页中刊载的文章或图片涉及侵权,请提供相关的权利证明和身份证明发送邮件到support@aicoin.com,本平台相关工作人员将会进行核查。


