In decentralized finance (DeFi), "liquidity" is a key resource that enables smooth transactions. When users deposit assets into a liquidity pool and receive corresponding LP tokens, they become liquidity providers; conversely, only those holding LP tokens can withdraw their deposited assets. "Locking" and "locking pools" are security measures derived from this mechanism:
The former involves locking personal tokens in a smart contract to reduce the amount of tokens freely circulating in the market; the latter involves locking the LP tokens of the entire liquidity pool, preventing project teams from easily withdrawing liquidity, thereby effectively reducing the risk of "rug pulls." Understanding the differences and uses of these two concepts is a prerequisite for further participation in the DeFi ecosystem and for protecting asset security.
1. Concept Interpretation
1. What is a locking pool? What is locking?
Locking: Also known as token locking, it refers to locking tokens in your wallet in a certain place so they cannot be moved, thereby reducing market circulation.
Locking Pool: This refers to the project team locking the LP tokens of the liquidity pool in a certain place, making it impossible to withdraw the pool and run away.
2. What are LP tokens?
- These are tokens from a liquidity pool (Liquidity Pool, LP). When you provide two types of tokens (A and B) as liquidity, you receive LP tokens as a receipt. With these LP tokens, you can withdraw from the pool. If the LP is locked, the pool cannot be withdrawn.
3. Does the pool have permissions?
- The pool does not have the concept of permissions because the liquidity pool is shared by everyone. Anyone who adds liquidity has a corresponding share. For example, if only one person adds liquidity to a pool, they control the entire pool. If 100 people add liquidity to a pool, each person holds a share proportional to their contribution.
2. Token Locking Process
Open PandaTool and connect your wallet.
Fill in the locking information (token address, amount, etc.).
Authorize the token.
Confirm the locking.
View the locking information.
Now, let's take a detailed look at how to operate.
1. Connect Wallet
First, we need to open the PandaTool locking page and connect the wallet in the upper right corner.

When connecting the wallet, pay attention to two points:
1. Wallet Plugins: OKX, MetaMask, and Phantom can be used, but only one should be kept active. It is best to close other wallet plugins.
2. Wallet Address: Make sure to switch to the correct wallet address and chain; if incorrect, it may not be recognized.
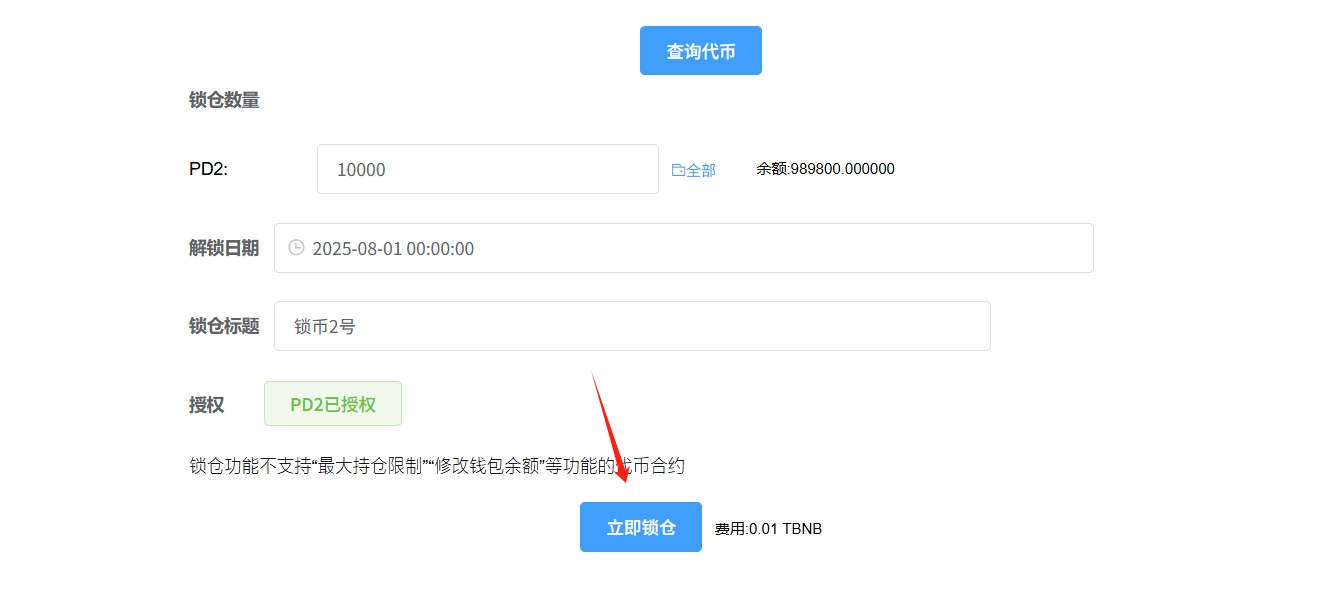
2. Fill in Locking Information
After connecting the wallet, we need to fill in the correct token information and locking details.
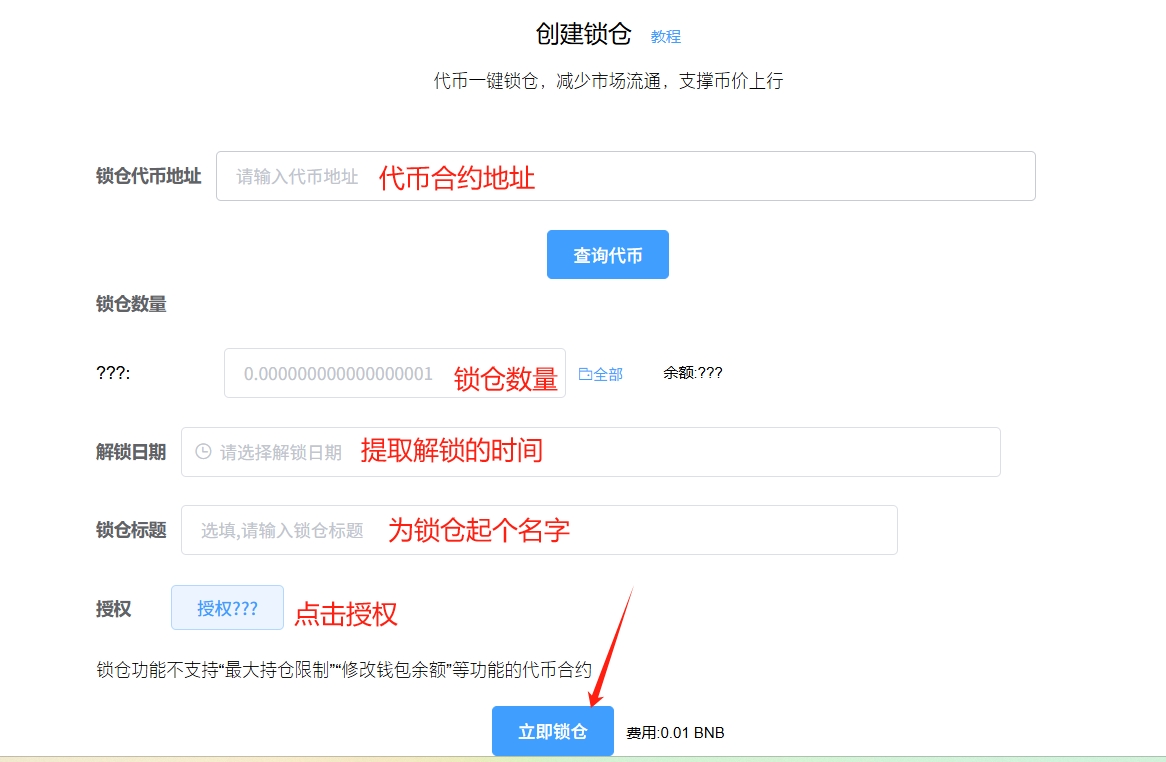
Locking Token Address: Fill in the contract address of the token to be locked (if you fill in the pool address, it will be locking the pool).
Locking Amount: Fill in the amount to be locked based on the queried token.
Unlock Date: Choose the date for unlocking (it cannot be unlocked before the expiration date, and the time is your local time).
Locking Title: You can write any title; it is just a name for this lock.
Authorization: Authorize the token to the routing contract.
The locking token address can be the pool address (i.e., LP token address). If you fill in the pool address, it is locking the pool. If you fill in the token address, it is locking the token.
For example, my filled content is as follows:
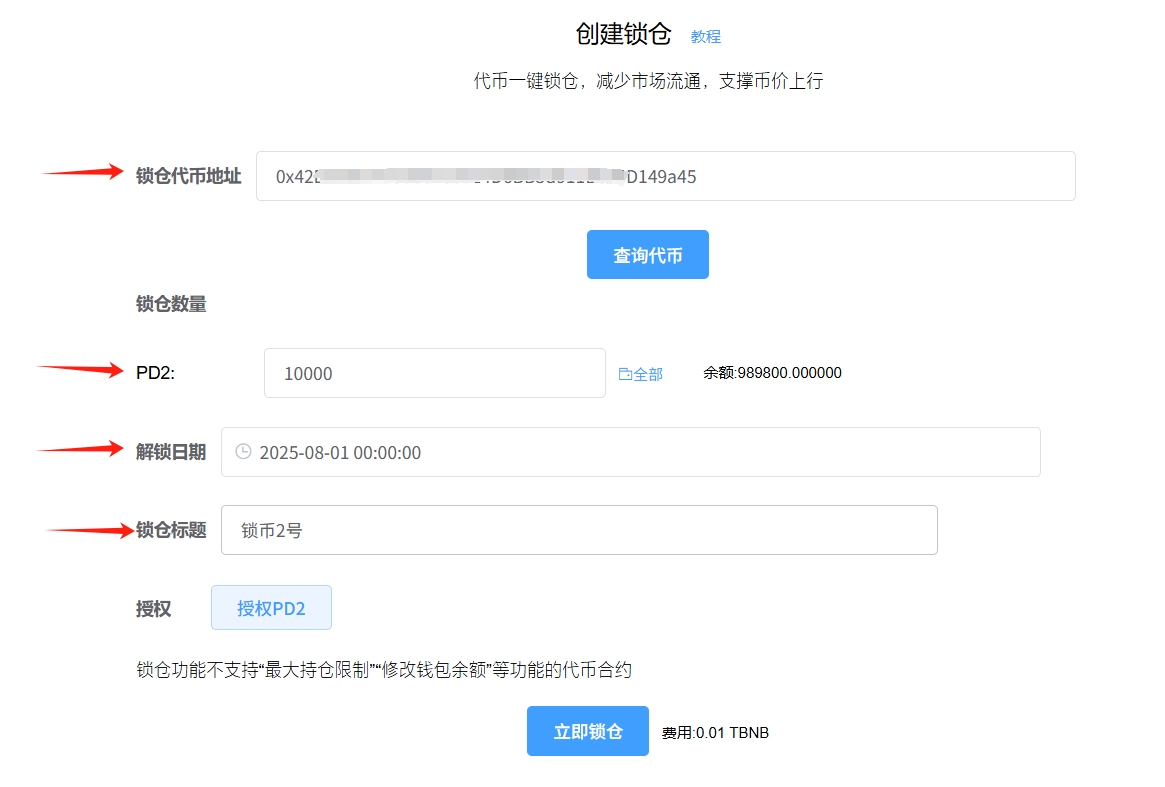
Note: Tokens with maximum holding limits or those that modify wallet balances are not supported for locking.
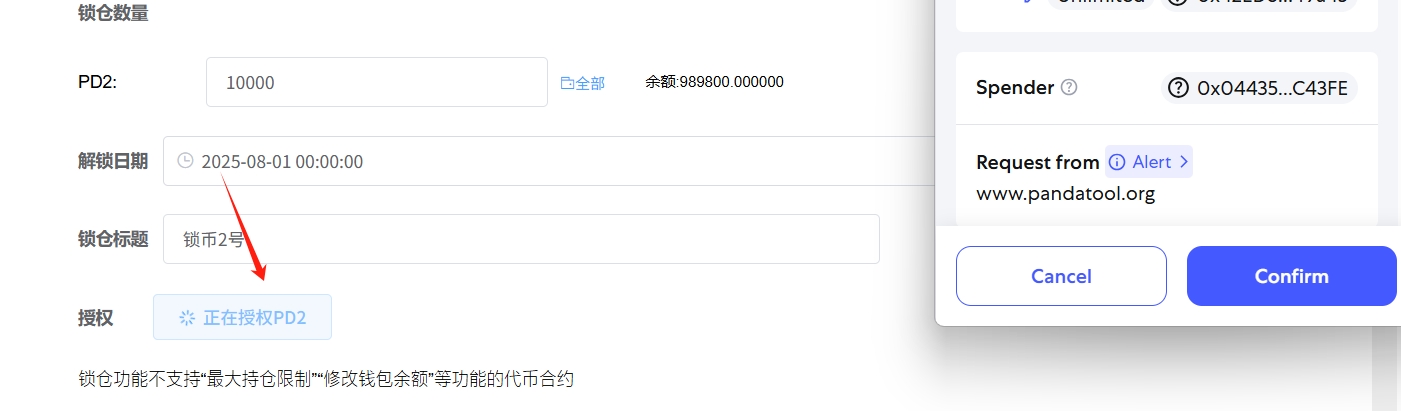
3. Authorize Token
After confirming that the information is correct, click authorize, and after the wallet confirmation, it will prompt that the authorization was successful.

4. Lock Immediately
After authorizing the token, we double-check the date and amount filled in. Once confirmed, click the 'Lock Immediately' button, and the wallet will pop up for confirmation.
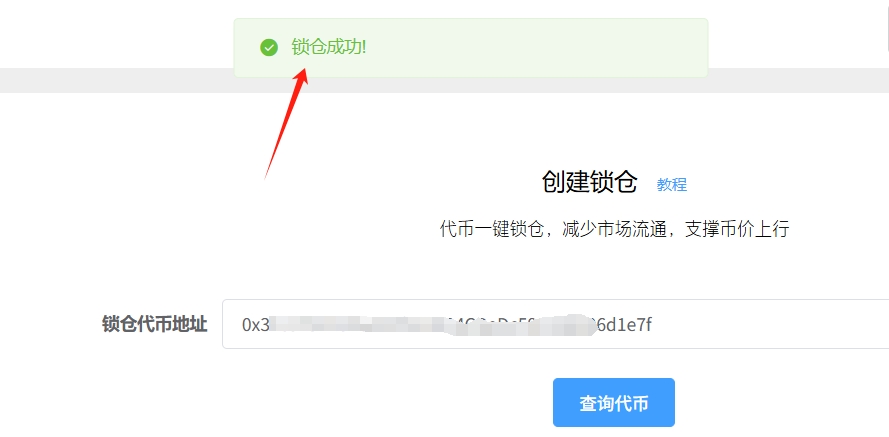
After the wallet confirmation, wait a few seconds to complete the locking.
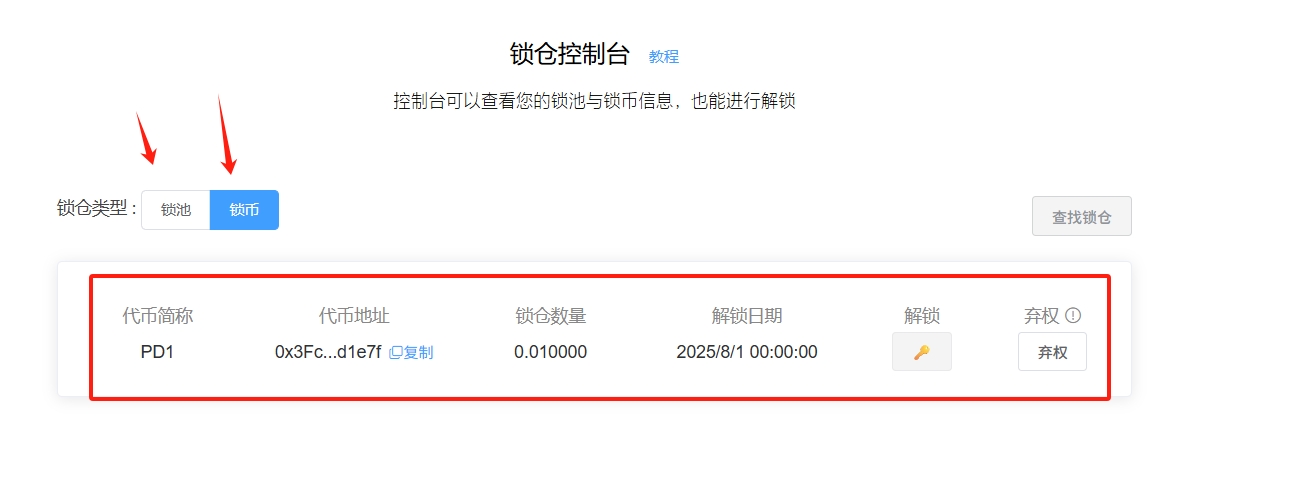
5. View Locking Information
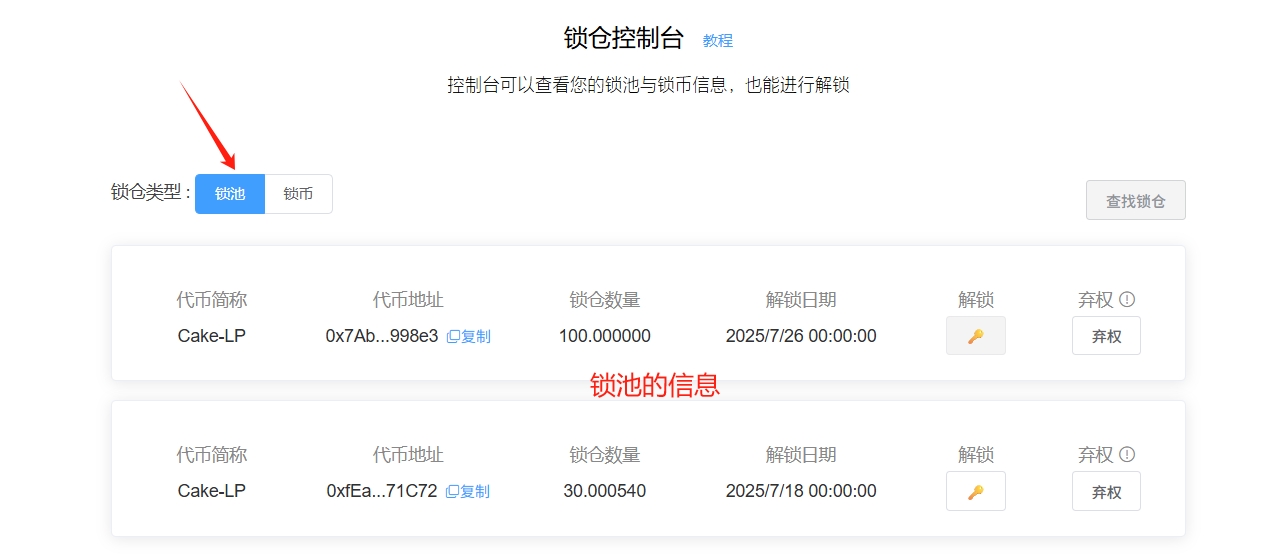
After locking, how do we check our locking information? When the time comes, where do we go to unlock? For this, PandaTool has developed a locking console that allows everyone to query and unlock.
By clicking into the locking console, you can see all the information about liquidity locks and token locks.

When the time comes, you can unlock here.
If you want to change the locking time to forever, how do you do it? Normally, changing the time is not supported, but you can click the Waive button to change it to permanently locked, meaning you will never be able to retrieve it.
3. Liquidity Lock Pool Tutorial
Having discussed locking, how do we operate the locking pool? There are two methods for locking pools:
First Method: Enter the pool address on the locking page to lock the LP tokens.
Second Method: Directly lock the pool through the liquidity console.
1. First Method: Locking Pool via Locking Operation
This method of locking the pool is very similar to locking tokens; we just need to fill in the pool address (i.e., LP address) where the token address is, and the other processes remain the same to complete the locking pool.
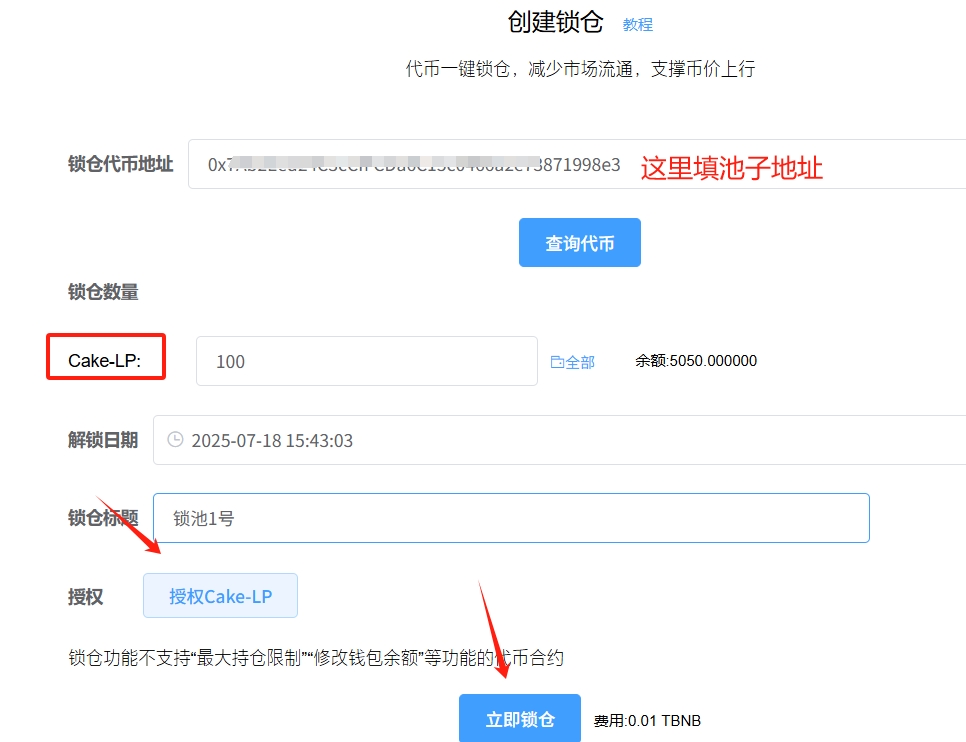
It can be said that aside from changing the address from the token address to the liquidity pool address, everything else is exactly the same, making it very convenient to operate. So, how do you obtain the pool address? You can query it in the liquidity console.
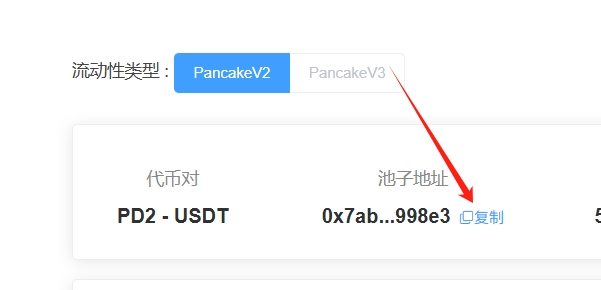
2. Second Method: Locking Pool via Liquidity Console
If you have already created liquidity, you can find your liquidity pool in our liquidity console, and then you can directly click to lock the pool. We enter the liquidity console.
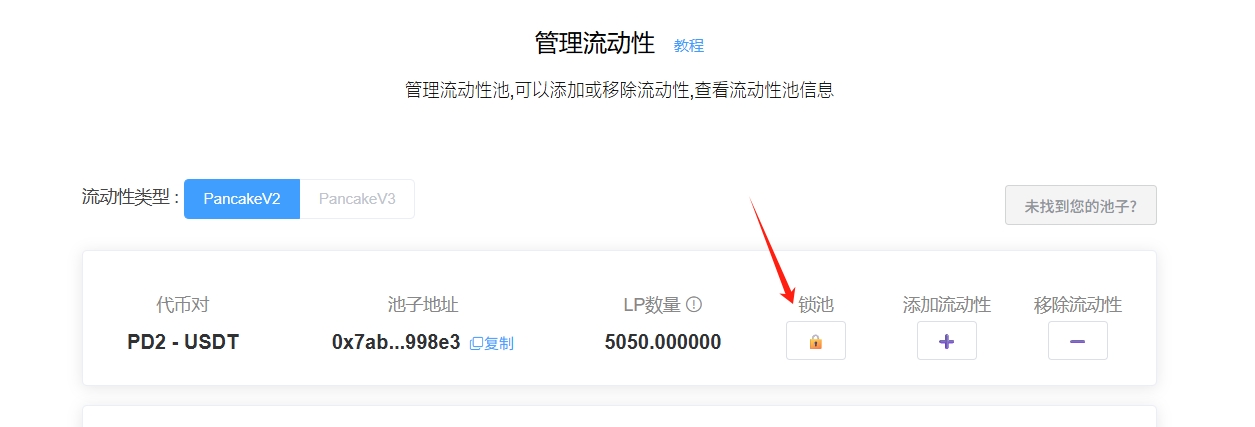
Click the lock pool button, then enter the relevant information.
Lock Pool Percentage: This percentage refers to the percentage of the pool you occupy, not the percentage of all liquidity.
Lock Pool Amount: The LP amount is automatically calculated based on the percentage.
Unlock Date: Set the unlock date according to your local time zone; LP cannot be withdrawn before the expiration date.
Lock Pool Title: Just give it any name; it is not mandatory to fill in.
LP Token Authorization: Authorization is required before withdrawing from the pool.
About the Percentage: Suppose you are the only one adding to the pool, then this percentage = the pool's percentage. If multiple people add to the pool, it needs to be calculated differently. For example, if you occupy 20% of the pool's share, even if you choose 100%, only 20% of the entire pool's liquidity will be locked. If you choose 20%, then only 4% of the entire pool's liquidity will be locked.
After authorizing the LP, click confirm to lock the pool, and wait a few seconds to complete it.
After locking the pool, where do we check? You can query our lock information in the locking console.
Thus, the entire tutorial on locking pools and locking tokens ends here.
免责声明:本文章仅代表作者个人观点,不代表本平台的立场和观点。本文章仅供信息分享,不构成对任何人的任何投资建议。用户与作者之间的任何争议,与本平台无关。如网页中刊载的文章或图片涉及侵权,请提供相关的权利证明和身份证明发送邮件到support@aicoin.com,本平台相关工作人员将会进行核查。


